5.2 Air Sealing
Airtight construction controls the flow of air and therefore the flow of airborne heat and moisture into and through the building envelope. It needs to be approached in a comprehensive manner on all sides of the envelope.
The most difficult aspect of air sealing is where dissimilar materials intersect, especially in complex geometry. The details that follow illustrate strategies for tackling some of the most commonly encountered intersections.
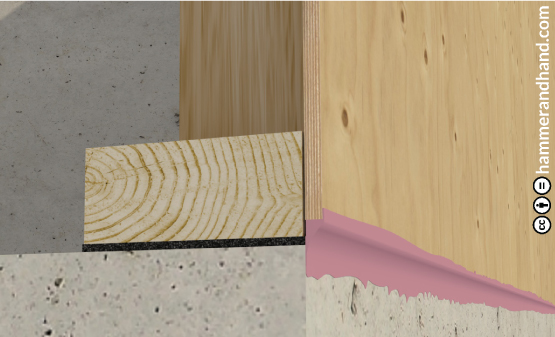
Foundation to Sheathing
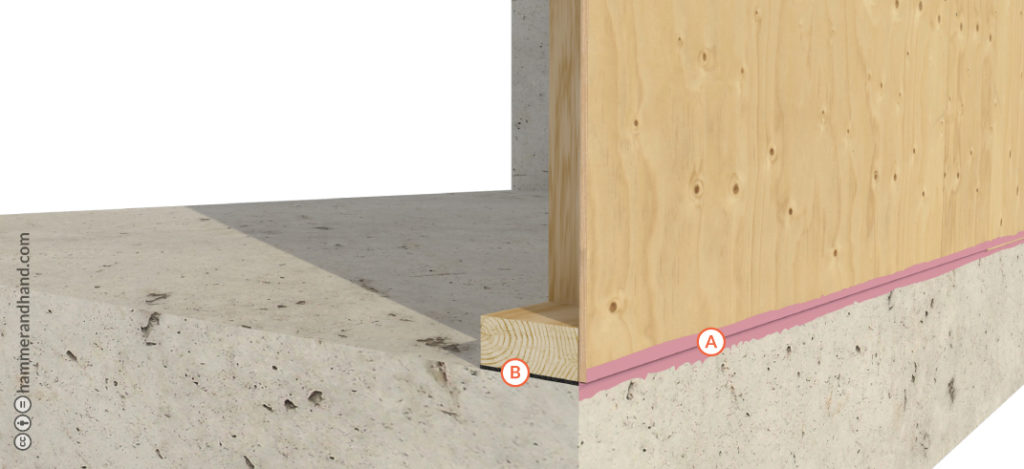
A. JOINT AND SEAM SEALANT OR APPROVED TAPE
B. SILL SEAL
1. To function as air barrier, foundation must be structural reinforced concrete.
2. Prevent sheathing-to-concrete contact.
At Sheathing
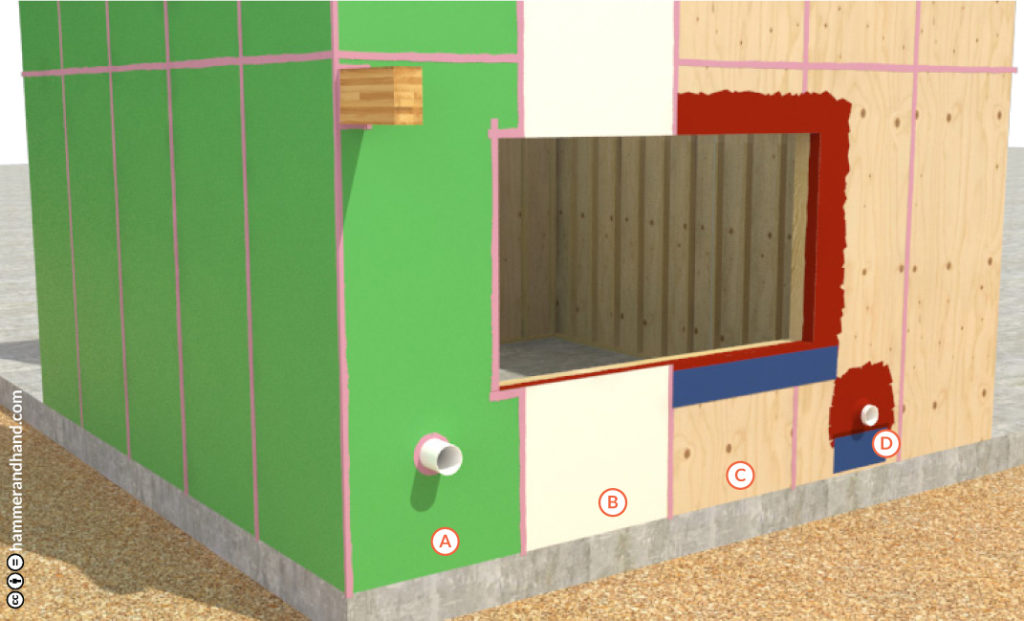
Materials:
A. RIGID PANEL WITH INTEGRAL WRB (ZIP SHEATHING OR SIMILAR)
Apply approved sealant at all joints, seams, and penetrations.
Apply fluid applied membrane at interior of punched openings.
B. RIGID PANELS WITH FLUID APPLIED WRB
Apply fluid applied system at punched openings, seams, and penetrations.
Cover entire exterior plane of envelope with fluid applied WRB.
C. RAW RIGID PANEL READY FOR FABRIC WRB
Apply fluid applied system at punched openings, joints, and penetrations.
Tile-in fabric WRB product into wet set transition sheets.
D. SEE SECTION 5.1 DUCT FLASHING WITH A RAIN SCREEN
Apply fluid applied system at punched openings, joints, and penetrations.
Tile-in fabric WRB product into wet set transition sheets.
D. SEE SECTION 5.1 DUCT FLASHING WITH A RAIN SCREEN
Air Barrier: Exterior Wall Sheathing to Interior Ceiling Transition
1. Install perimeter rip of rigid panel before ceiling framing/trusses are set, extend past interior edge of top plate a minimum of 1” for flat ceiling over top plate.
2. Seal perimeter rip panel edges prior to setting trusses.
3. For vaulted ceilings extend rigid panel 1/2” past inside of top plate.
Wall to Ceiling/Roof
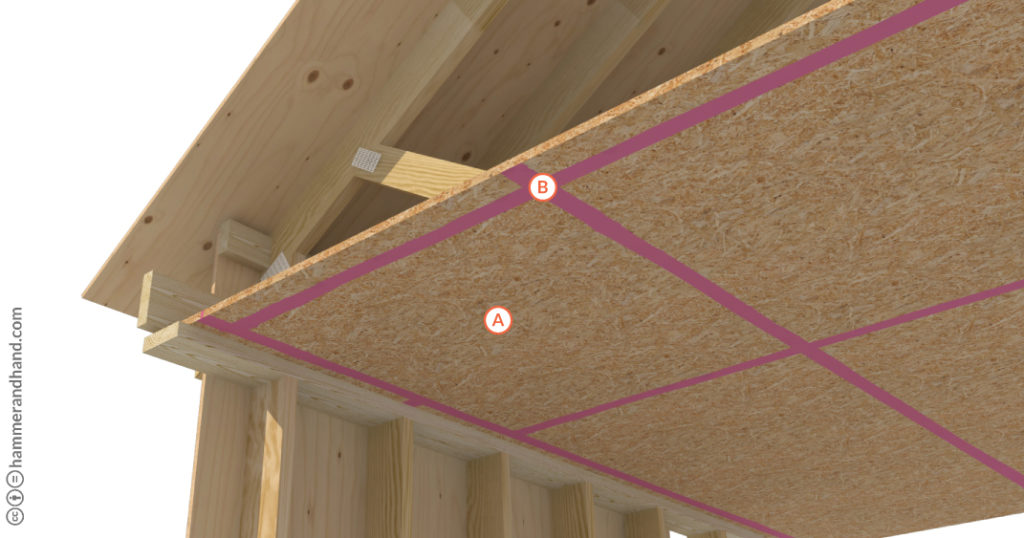
A. AIR BARRIER AT CEILING
B. JOINT AND SEAM SEALANT OR APPROVED TAPE
B. JOINT AND SEAM SEALANT OR APPROVED TAPE
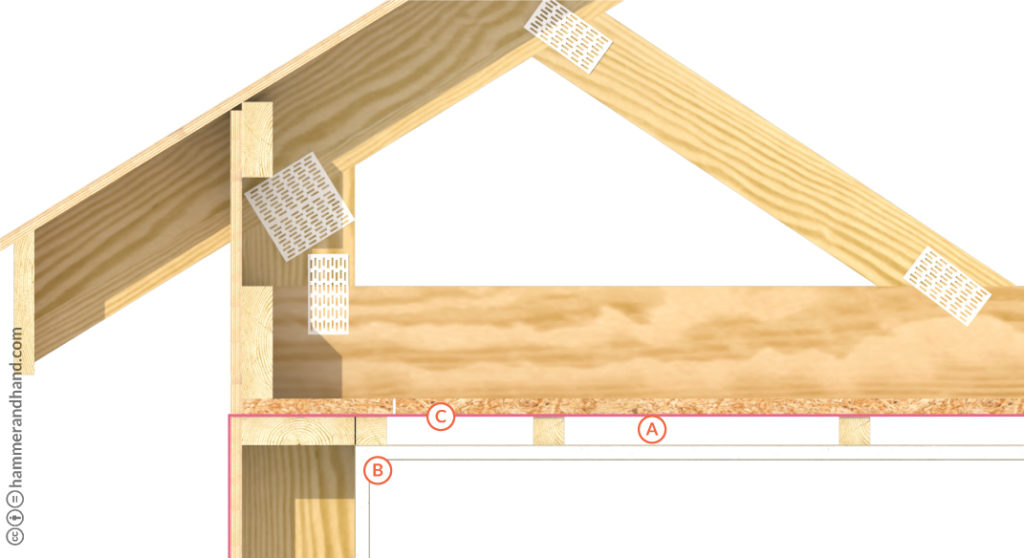
A. 1.5″ SERVICE CAVITY
B. DRYWALL
C. RIGID PANEL WITH SEALANT OR TAPE
B. DRYWALL
C. RIGID PANEL WITH SEALANT OR TAPE
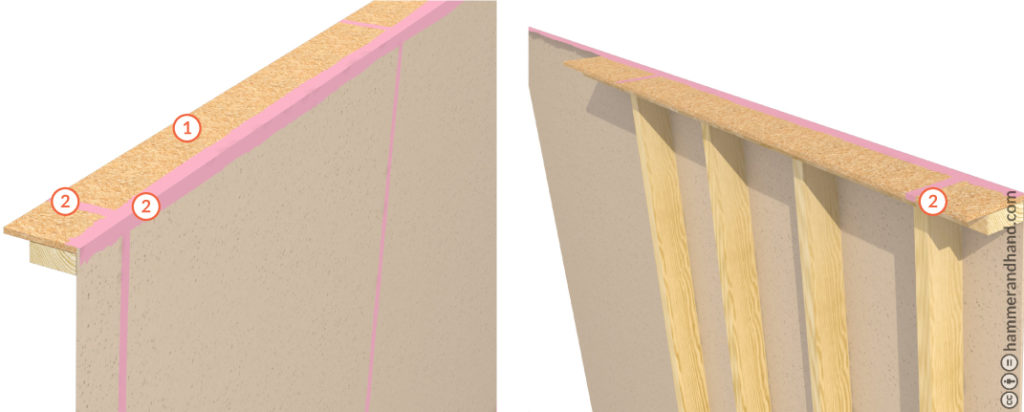
If Vaulted Ceiling with Exterior Air Barrier, Seal Wall to Roof Sheathing
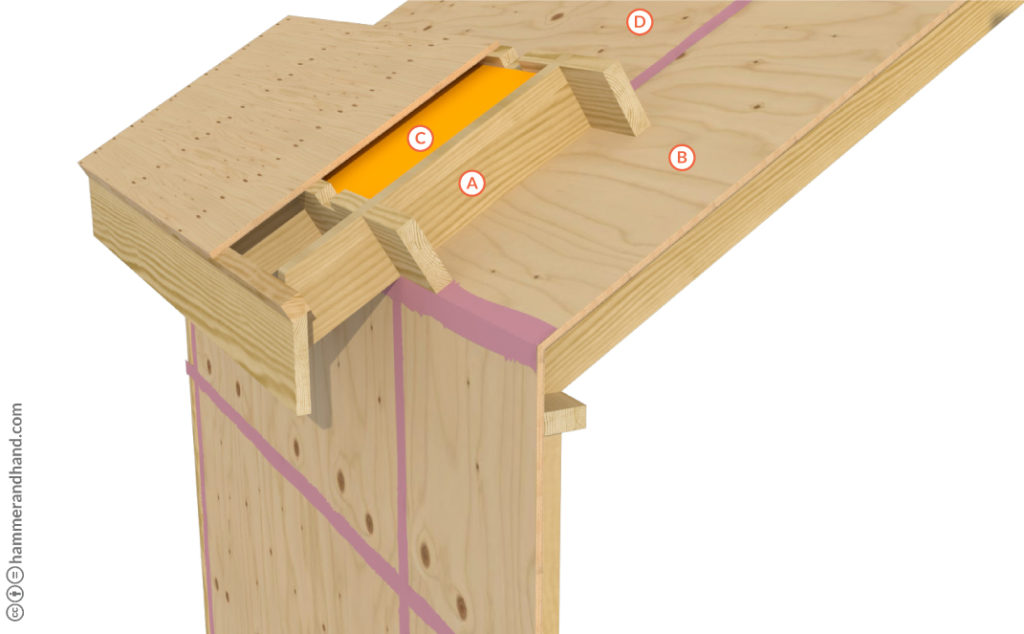
A. IF VAULTED CEILING, INSTALL OVERHANGS AS ADDITIONAL FRAMING SYSTEM ABOVE STRUCTURAL SHEATHING
B. THIS SHEATHING LAYER IS ALSO THE AIR BARRIER AND WILL BE SEALED AT ALL PANEL EDGES
B. THIS SHEATHING LAYER IS ALSO THE AIR BARRIER AND WILL BE SEALED AT ALL PANEL EDGES
C. RIGID INSULATION OR MINERAL WOOL BETWEEN FRAMING. INSULATION TO BE 1″ SHALLOWER THAN FRAMING TO ALLOW FOR VENTILATION CHANNEL
D. INSULATION ABOVE OVERHANG FRAMING TO BE PROVIDED WITH VENTED NAIL BASE OR SIMILAR