Parapet walls are a difficult detail with a long history of failure. Unlike standard exterior walls, parapet walls are exposed to the elements on three sides. Furthermore, parapets are often inadvertently connected to interior space via balloon framing, gaps in structure, or penetrations for wiring and mechanicals, introducing warm, moist interior air into the assembly and potential condensation. To address these conditions, detailing must provide excellent bulk water management of roofing, parapet wall, and parapet cap, venting to promote drying, and careful attention to separating the parapet from interior spaces.
1. Height of roofing at wall: minimum of 12” to top of parapet.
- Do not lap TPO over top of parapet unless required by unique construction conditions.
2. Top of parapet, below cap, to be sealed with fluid applied flashing.
3. Venting in wood framed parapets:
- Provide venting to each wall cavity.
- If cavity is greater than 12” above roof insulation, provide high/low venting in each wall cavity.
- Can use round/louvered ‘soffit vents’ to limit bulk water intrusion if venting holes are in exposed locations.
- For areas which do not need above, cover hole with bug screen.
- Ensure ventilated siding cavity is correctly vented yet covered against bulk water intrusion at top.
4. Railing Attachments
- Side wall: see Section 6.4: Flat Roof Assemblies.
5. Special Considerations
- Strive to avoid penetrations through top of the parapet wall. If unavoidable, get further direction from design team before proceeding.
- Likewise, strive to avoid balloon framing of the parapet wall. If unavoidable, get further direction from the design team before proceeding.
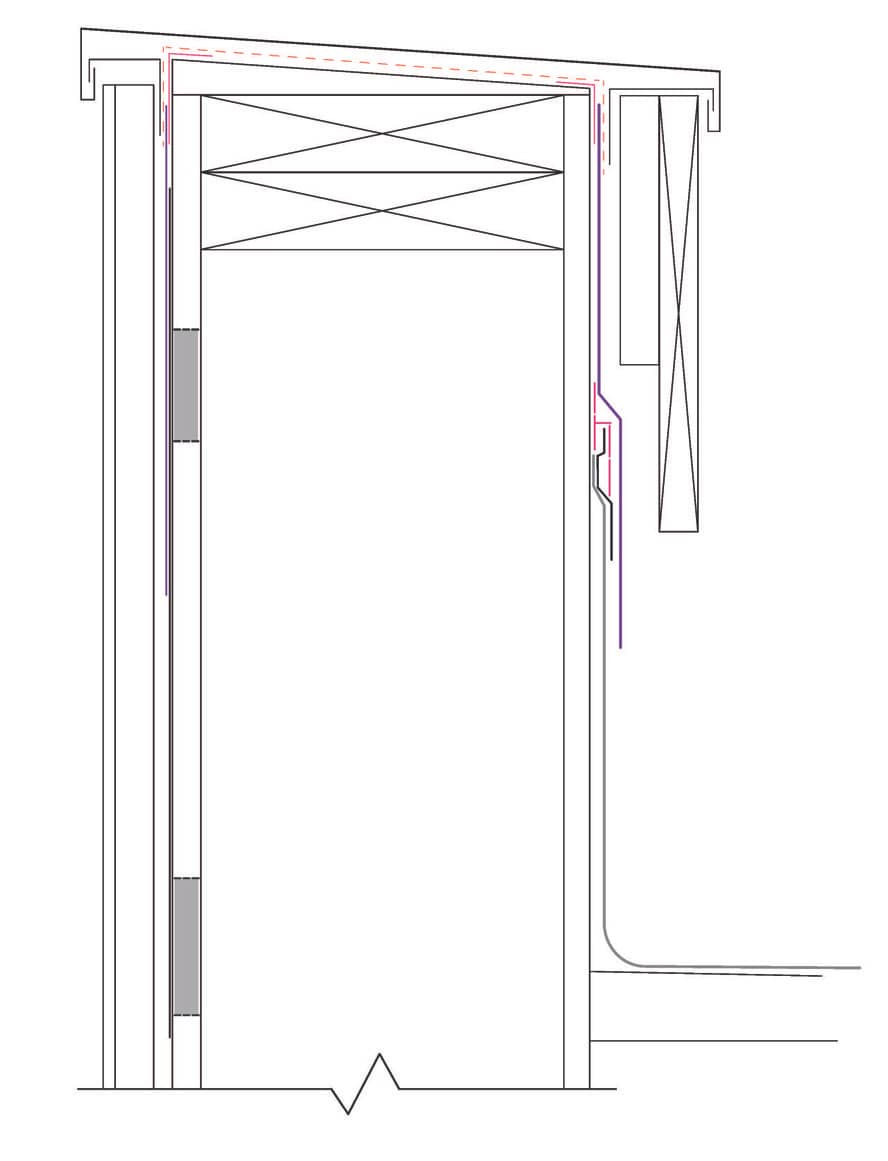
Venting and Roofing for Parapet Walls
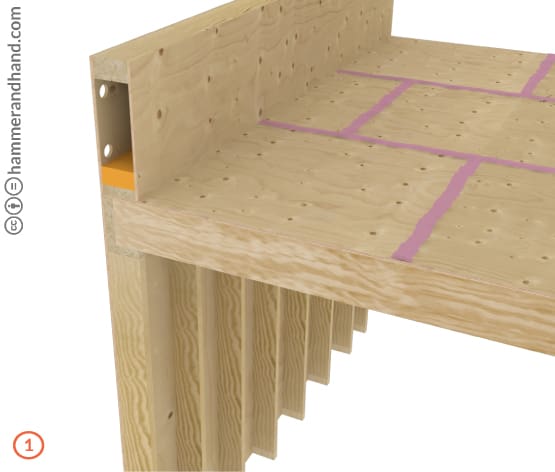
Venting in wood framed parapets:
- Provide venting to each wall cavity.
- If cavity is greater than 12,” provide high/low venting in each wall cavity.
- Can use round/louvered ‘soffit vents’ to limit bulk water intrusion if venting holes are in exposed location.
- For areas which do not need above, cover hole with bug screen.
- Insulate within parapet wall cavity to depth of roof insulation (if present).
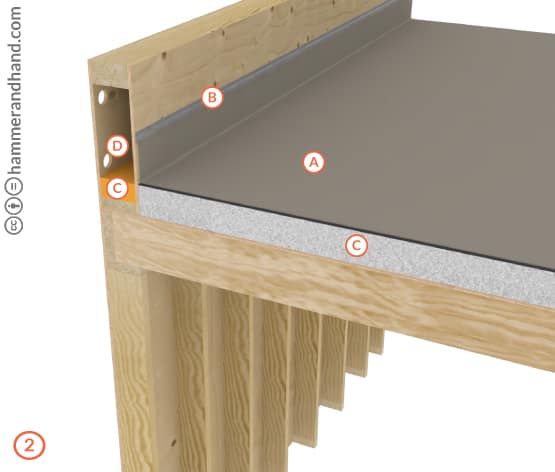
- Roof membrane must lap up wall to minimum of 12” above roof plane or per specifications, whichever is greater.
- Terminate roofing on parapet wall with mechanically fastened termination bar.
A. ROOF MEMBRANE
B. TERMINATION BAR
C. INSULATION
D. VENTILATION HOLES
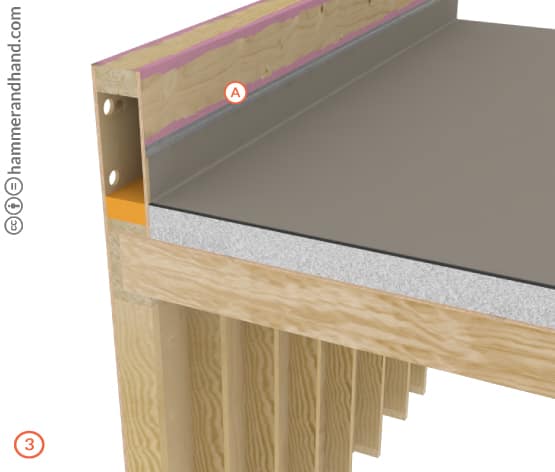
- Counterflash termination bar with fluid applied flashing (FAF) to be encapsulated at both top and face, covering fasteners.
A. APPROPRIATE FAF
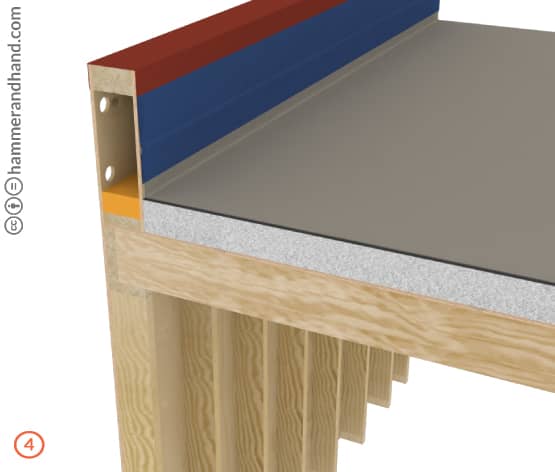
- Top of parapet below cap to be sealed with vapor permeable FAF.
- Install either fluid applied WRB from termination bar up and over parapet top or cover transition with transition strip.
Complete Parapet Wall
Interior
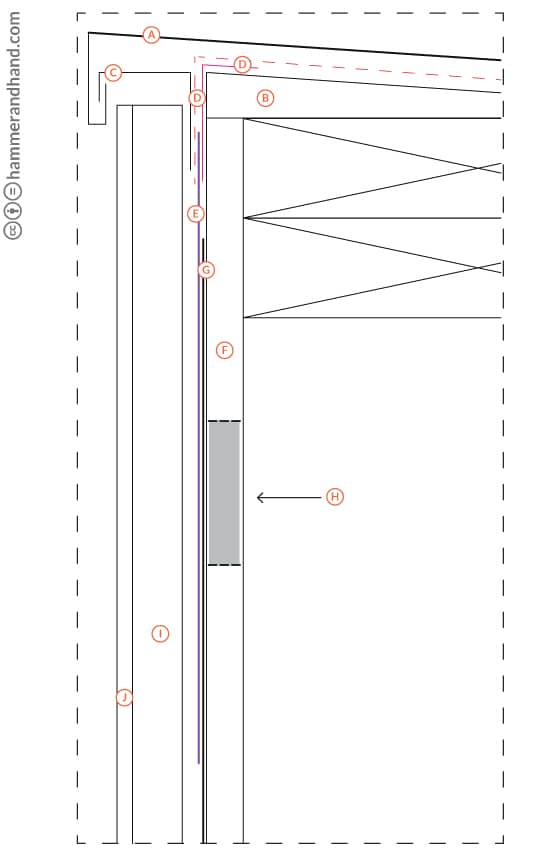
A. 24 GAUGE MINIMUM PARAPET CAP
B. WEDGE
C. C-CLIP
D. FLUID APPLIED FLASHING
E. VAPOR PERMEABLE TRANSITION STRIP
F. 1/2” SHEATHING
G. WRB
H. VENT HOLES
i. 1X4 FURRING
J. SIDING
B. WEDGE
C. C-CLIP
D. FLUID APPLIED FLASHING
E. VAPOR PERMEABLE TRANSITION STRIP
F. 1/2” SHEATHING
G. WRB
H. VENT HOLES
i. 1X4 FURRING
J. SIDING
Exterior
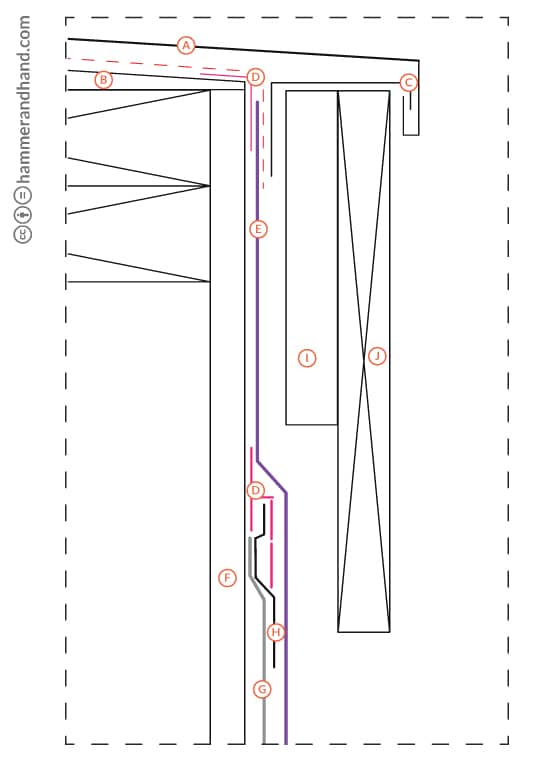
A. 24 GAUGE MINIMUM PARAPET CAP
B. WEDGE
C. C-CLIP
D. FLUID APPLIED FLASHING
E. VAPOR PERMEABLE TRANSITION STRIP
F. 1/2” SHEATHING
G. ROOFING
H. TERMINATION BAR
I. FURRING
J. SIDING/TRIM
B. WEDGE
C. C-CLIP
D. FLUID APPLIED FLASHING
E. VAPOR PERMEABLE TRANSITION STRIP
F. 1/2” SHEATHING
G. ROOFING
H. TERMINATION BAR
I. FURRING
J. SIDING/TRIM