“The fundamental principle of water management is to shed water by layering materials in such a way that water is directed downwards and outwards out of the building or away from the building. The key to this fundamental principle is drainage. The most elegant expression of this concept is flashing. Flashings are the most under-rated building enclosure component and arguably the most important.”
-Joe Lstiburek
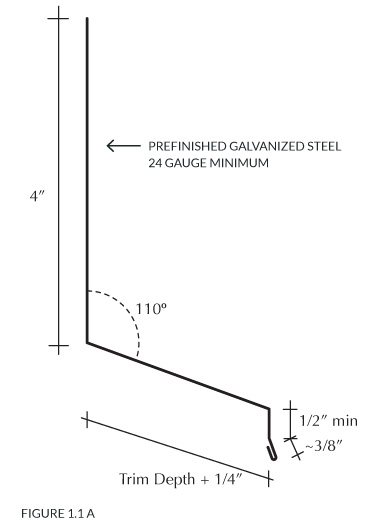
A. FLASHING DIMENSIONS
B. FLASHING: WHERE TO INSTALL IT
Flashings should be installed:
1. At all horizontal joints between different exterior finishes unless the upper finish overlaps the lower finish.
2. At every offset in cladding, changes in cladding substrate, and at all penetrations (horizontal transitions between siding, stone, brick, tile, or stucco).
3. Where stresses can be concentrated (such as at the rim joist/foundation joint).
4. Where drainage is compromised (such as a change from wall cladding to parging).
5. The top and bottom of windows, doors, and all penetrations (vents, lights, hose bibs, electrical outlets, electrical meters, etc).
C. FLASHING: IMPORTANT POINTS
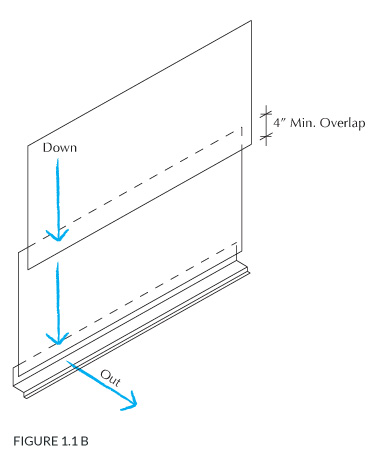
1. Building paper lapping: Install in a shingled fashion with the upper sheet always overlapping the lower sheet by a minimum of 4”. This and the down and out principle shown below.
2. NEVER rely on any self-adhering membranes (tape, peel and stick) in lieu of properly shingled laps or fluid applied flashing.
3. Minimum flashing slope: 20 degrees.
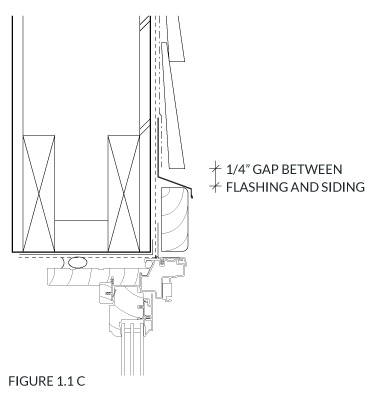
4. Leave a 1/4” minimum gap between cladding termination and sloped metal drip flashings, shown in figure 1.1 C (this detail can also apply to other flashing details such as: belly bands, exterior penetrations, etc.).
5. If above average shrinkage or differential movement is expected (wood to masonry transition or multi-story building) the minimum gap between flashing and the cladding should be increased to 1/2”.
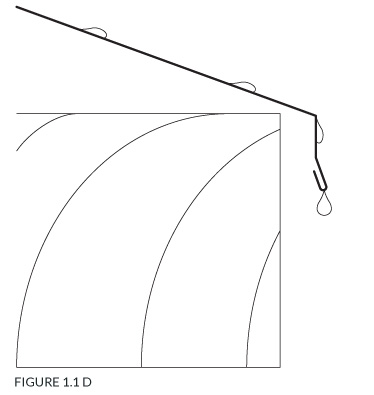
D. Drip Edges
Flashing with a hemmed drip-edge breaks water surface tension and prevents water from running along the underside of the flashing and back into the wall.