The conventional approach to deck construction creates a dangerous condition: a wood-to-wood connection between deck ledger and building structure in which the ledger wood gets wet regularly, transfers moisture into the building structure, and does not dry well.
The result can be rot and deck collapse. Our approach solves this by properly
flashing the building at the point of connection with the ledger, and then holding the ledger off the face of the building with simple spacers.
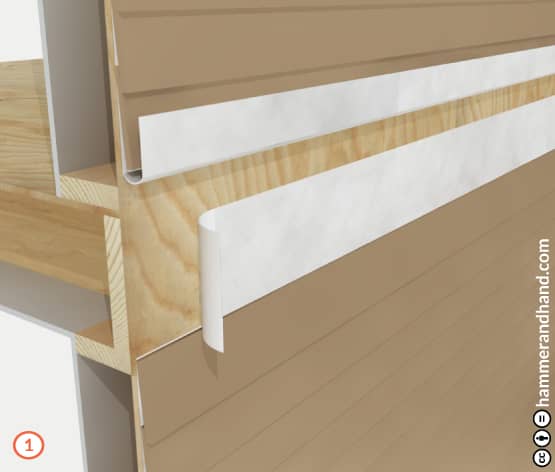
- Remove siding where ledger is to be attached and fold up and pin existing building membrane above install zone.
- Cut away lower piece to align with top of remaining siding below the ledger install space.
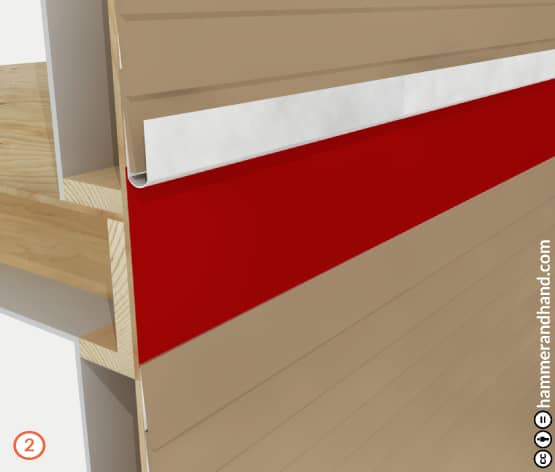
- FastFlash exposed sheathing.
- Be sure to lap over lower section of building membrane and as far as possible up under the folded up piece.
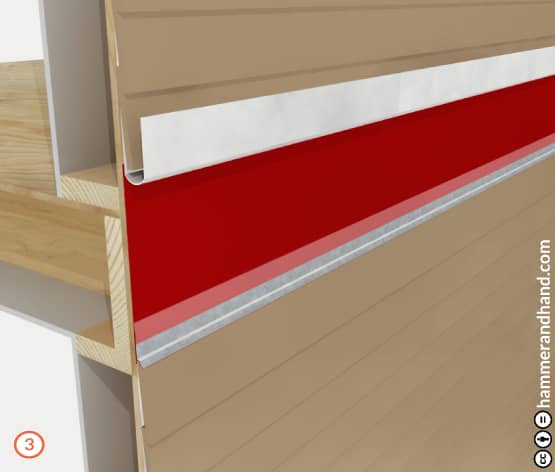
- Embed top of sheet metal flashing into a bead of FastFlash or Joint & Seam Filler.
- Bead and tool Joint & Seam Filler over top of flashing leg for a continuous drainage plane.
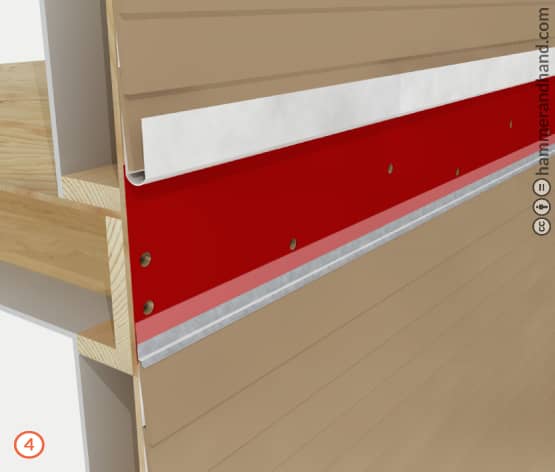
- Drill pilot holes for attaching ledger board through structural sheathing and rim joist.
- When using lags instead of bolts, be sure pilot holes are slightly smaller than lag diameter.
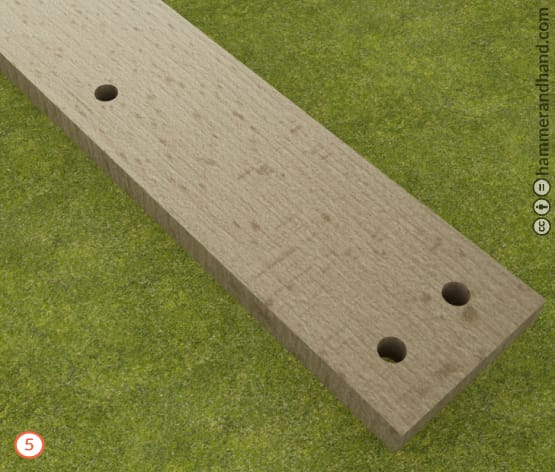
- Drill pilot holes in the PT ledger board according to plans from the designer. Make sure pilot holes are slightly smaller than the lag (if bolts are not being used).
- Note: Ledger can be temporarily tacked in place to pre-drill through ledger and rim in one step. Ex. 3/8” pilot hole for a 1/2” screw.
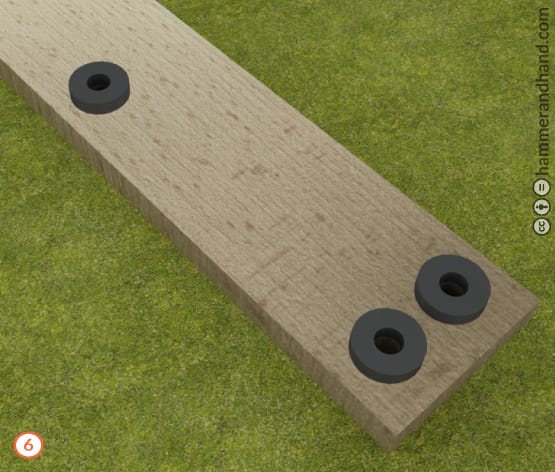
- Center spacers over bolt holes.
- Deck2Wall brand spacers are recommended.

- Attach spacers with corrosion-resistant nails or screws.
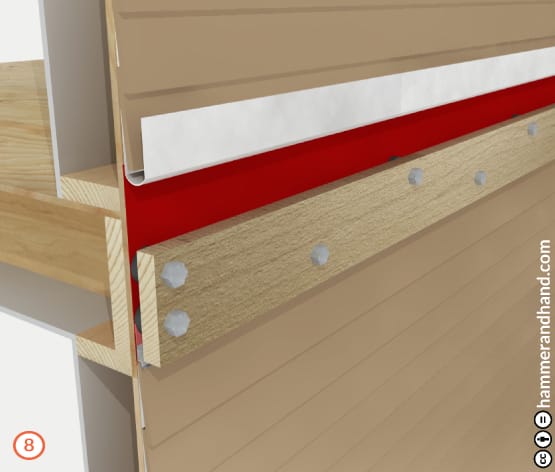
- Dab a generous amount of FastFlash in and over the pilot holes in the sheathing and rim joist before attaching ledger board to prevent moisture intrusion.
- Bolt on PT ledger board.
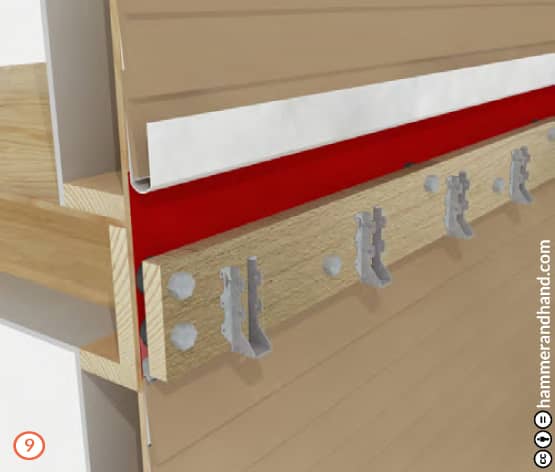
- Attach joist hangers over top of FastFlashed ledger board.
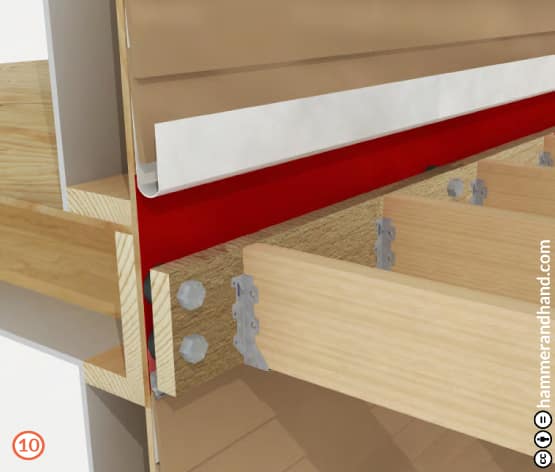
- FastFlash around the ends of the joists before setting into joist hangers.
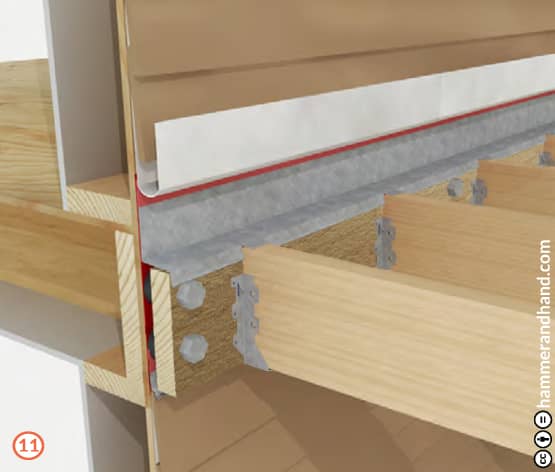
- Install flashing above ledger board. Cut slots where joists intersect with flashing and bend the leg straight along the top of the joist. Hammer flat.
- Bead and tool Joint & Seam Filler over top of sheet metal flashing leg for a continuous drainage plane.
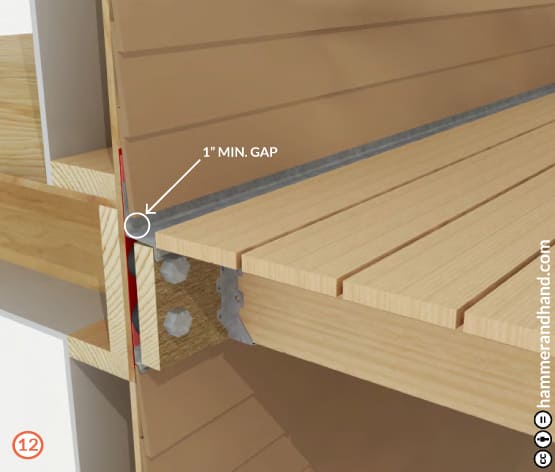
- Attach decking.
- Replace necessary siding, allowing for a 1”- 2” gap above flashing to prevent water damage to cladding.