Head Flashing Specifications:
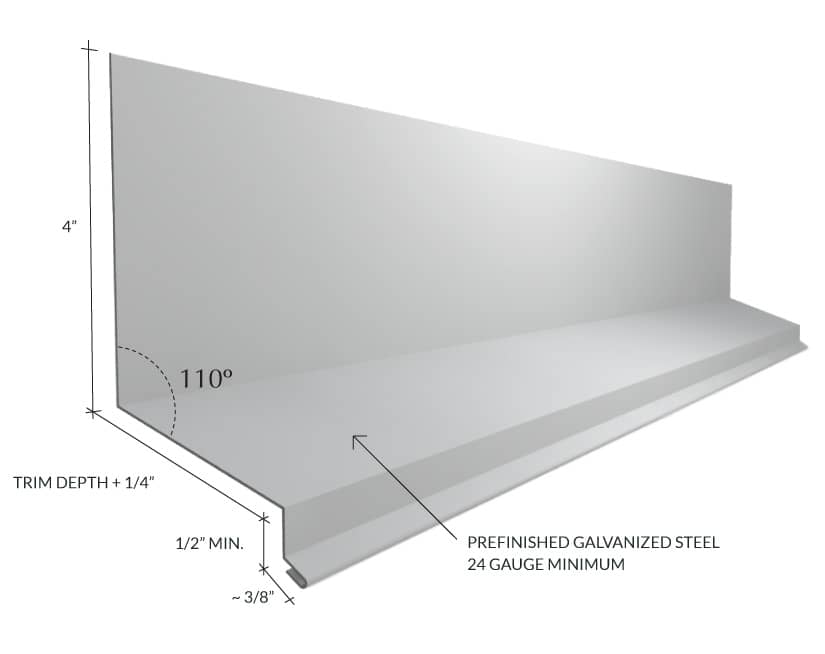
About Head Flashing:
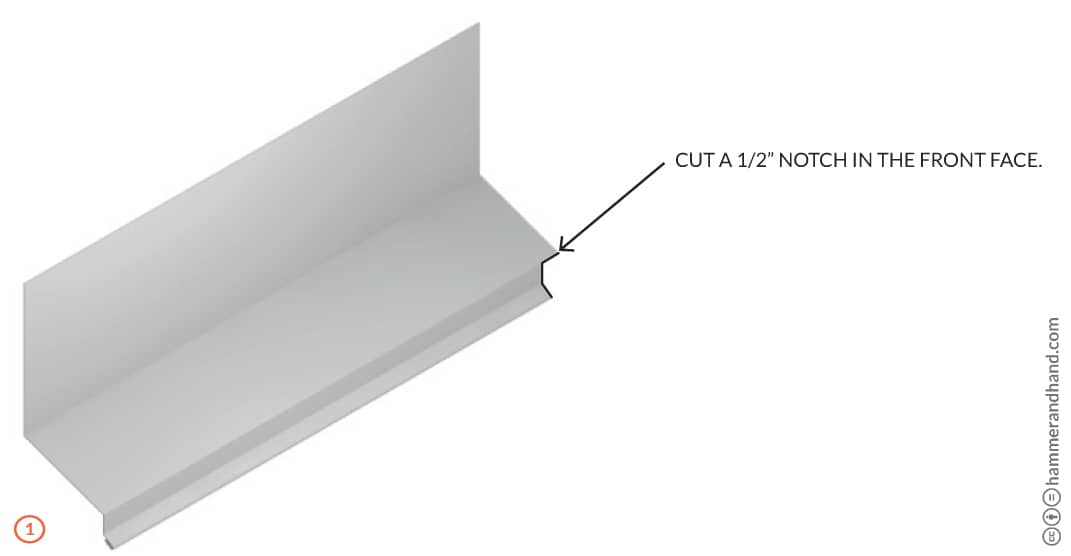
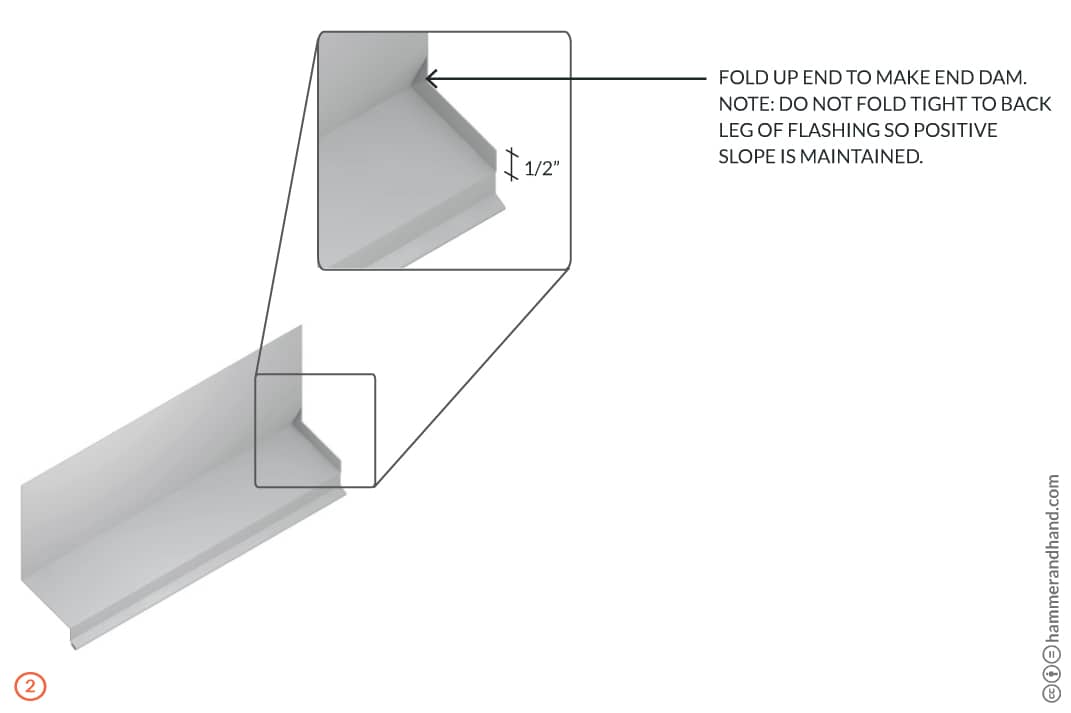
In high exposure locations, head flashing should incorporate an end dam to prevent water from running off the end of the flashing. At this location the cladding may need to be cut to fit around the projection of the end dam.
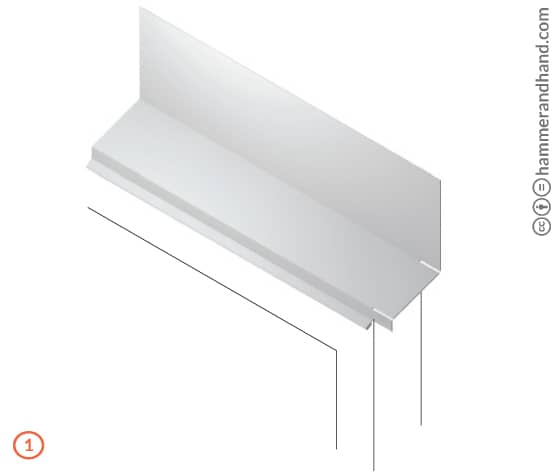
- Clip flashing back to window casing at bends to create flaps for bending.
- Trim hemmed edge so it ends at the edge of the window casing and does not extend with the other tabs.
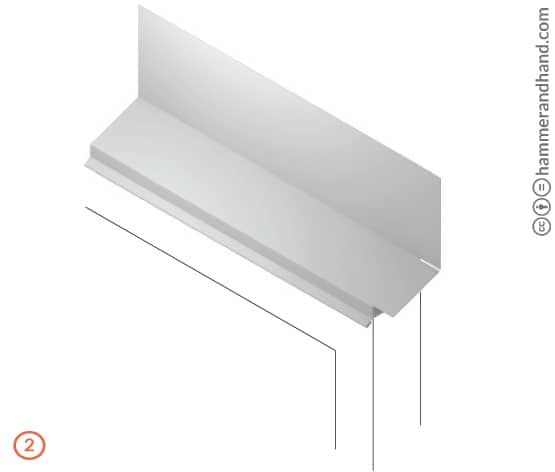
- Fold front tab back against side of casing.
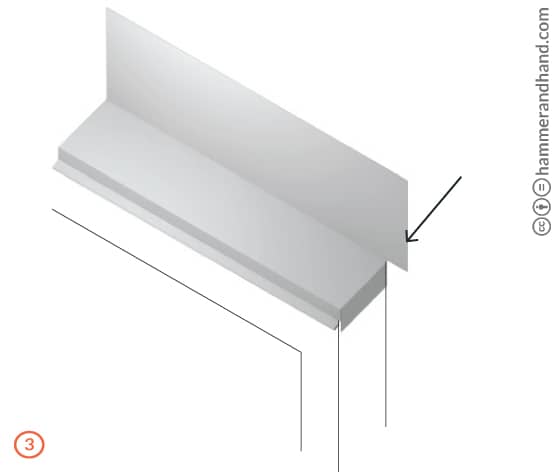
(Arrow) Back leg of flashing should extend past head casing.
- Fold down the horizontal part of flashing over the side of the window casing.
- Solder head flashing at the ends to make watertight.