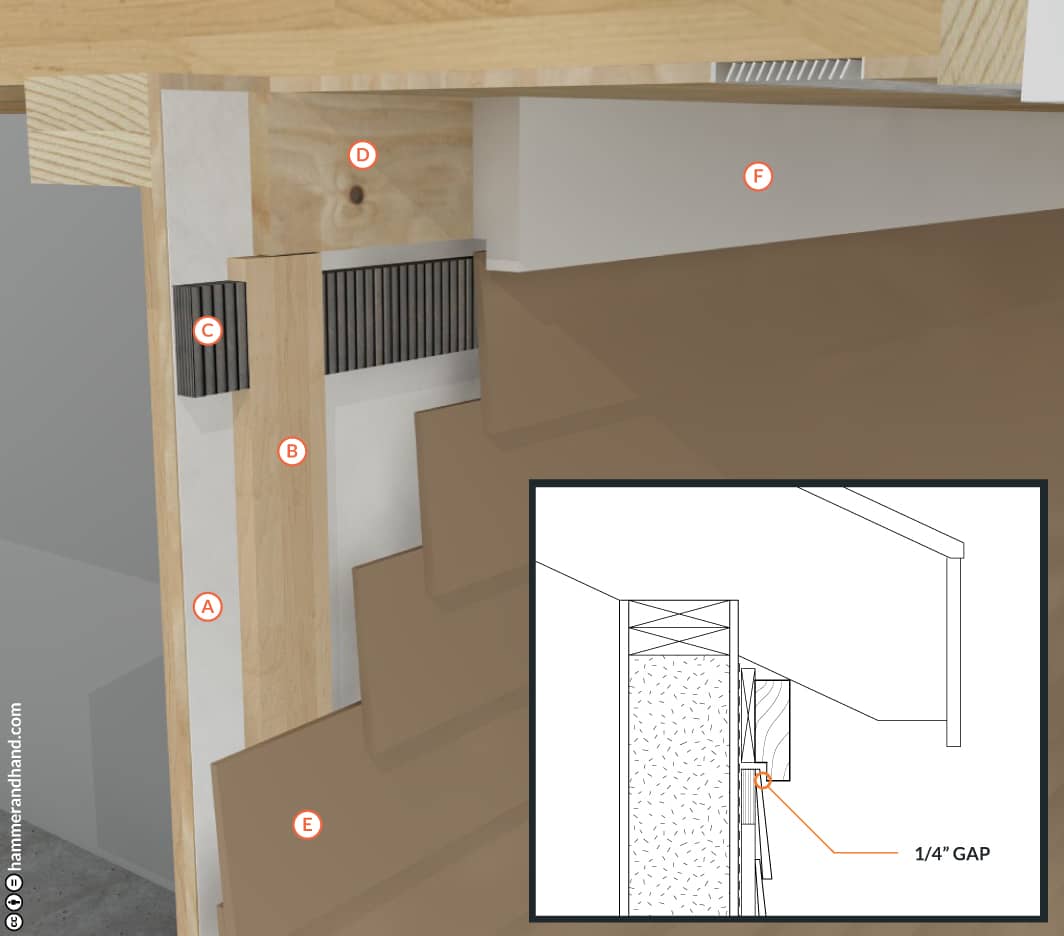
A. WRB (WATER-RESISTIVE BARRIER)
B. FURRING
C. COR-A-VENT SV-5
D. TRIM BLOCKING
B. FURRING
C. COR-A-VENT SV-5
D. TRIM BLOCKING
E. CLADDING
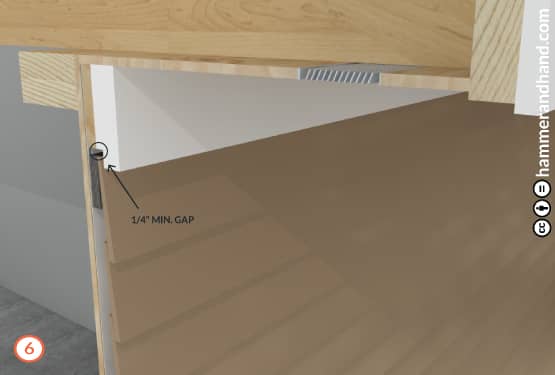
F. TRIM
F. TRIM

- When the WRB is complete and lapped correctly, the rain screen installation begins.
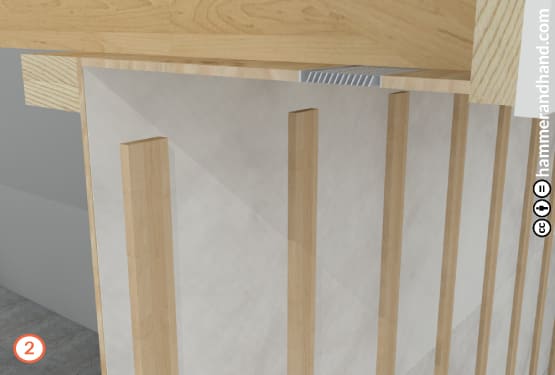
- Install vertical furring to correspond with the framing method (aligned with vertical framing members).
- Use untreated 1×4 furring.
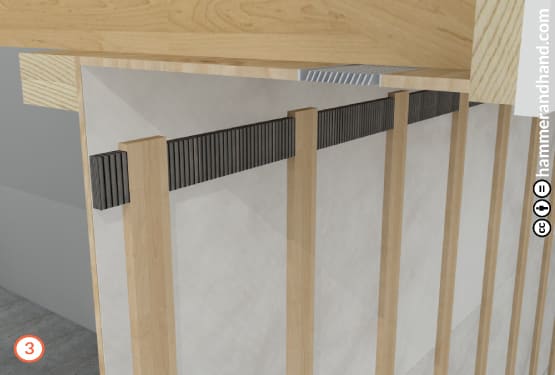
- Attach Cor-A-Vent SV-5 insect blocker strip between furring.
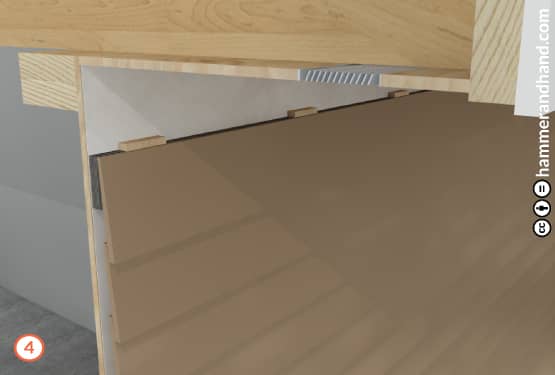
- Attach siding.
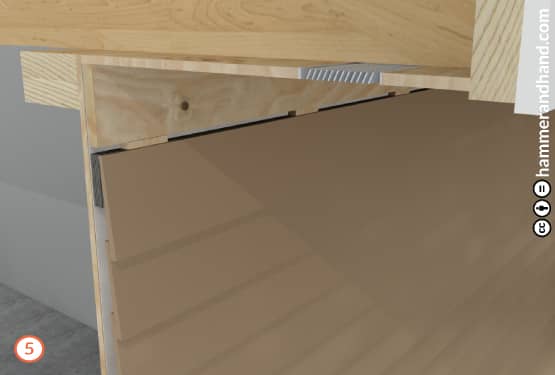
- Install blocking to attach the rabbeted trim to.