
Windows
Windows, and their installation, are critical to any Passive House project, as each window opening represents a hole in an otherwise fairly impervious envelope. Each penetration introduces the potential for thermal loss and air and water intrusion. High performance components are key. At Glasswood we used Cascadia 300 series triple pane windows with insulated fiberglass frames and high solar heat gain, an excellent window that gives R-5 in assembly. Like the walls that surround them, these thermally resistant windows, installed in airtight assembly, were central to the project’s strategy to reach Passive House levels of performance.
Any window is, by nature, failure-prone. They are complex, full of junctions, corners, and seams: rife with opportunity to leak moisture. Although high quality windows may take decades to fail, it is not a matter of if windows leak, but when. And given that super-insulated, airtight wall assemblies do not dry as readily as the leaky walls of conventional construction, Hammer & Hand realized early on that we had to detail our rough openings to be (1) completely water-resistant to keep water from penetrating the wall assembly, (2) vapor-permeable to let construction moisture, seasonal moisture fluctuation and exterior moisture evaporate from the wall, and (3) airtight. Airtightness is crucial in high performance construction partly because airtight detailing also helps ensure proper detailing for energy performance and prevention of water intrusion. If you are controlling for air, you are controlling for energy and moisture.
In the Pacific Northwest, the simplest way Hammer & Hand has found to achieve this is through vapor-permeable liquid-applied flashing. Any rain that hits the window opening or leaks through the window drips down to a liquid-applied membrane installed around it into the rough opening (with the window air-sealed to the inside) and out to the exterior moisture-management layer. On the Glasswood project, and most other Hammer & Hand projects, we used a liquid applied flashing system manufactured by Prosoco called FastFlash.
As an installation method, liquid-applied flashing is as close to foolproof as anything we know. It is much harder for a carpenter having a bad day to make mistakes with a liquid-applied membrane than with the “origami” of tapes, peel and stick, and papers. Window installation sequences using the conventional methodology involve anywhere between 50 and 100 separate steps per opening. The chances of getting every install done perfectly approach zero as you multiply across the number of openings in a typical building. Liquid applied flashing presents not only fewer steps, but also more verifiable results. Errors, like inadequate coverage, are easy to identify because they are not hidden by layers of tapes and paper. A little spot touching fixes the problem.
Window installation at Glasswood involved four steps:
i. Prepare the rough opening: The first step was to ensure that the rough openings were ready for the install. In this retrofit context Hammer & Hand placed a secondary sloped sill to span the framed sill, exterior EPS, and cladding layers. This served both to facilitate drainage outward and to provide a fresh, uniform surface for prep of the rough opening.
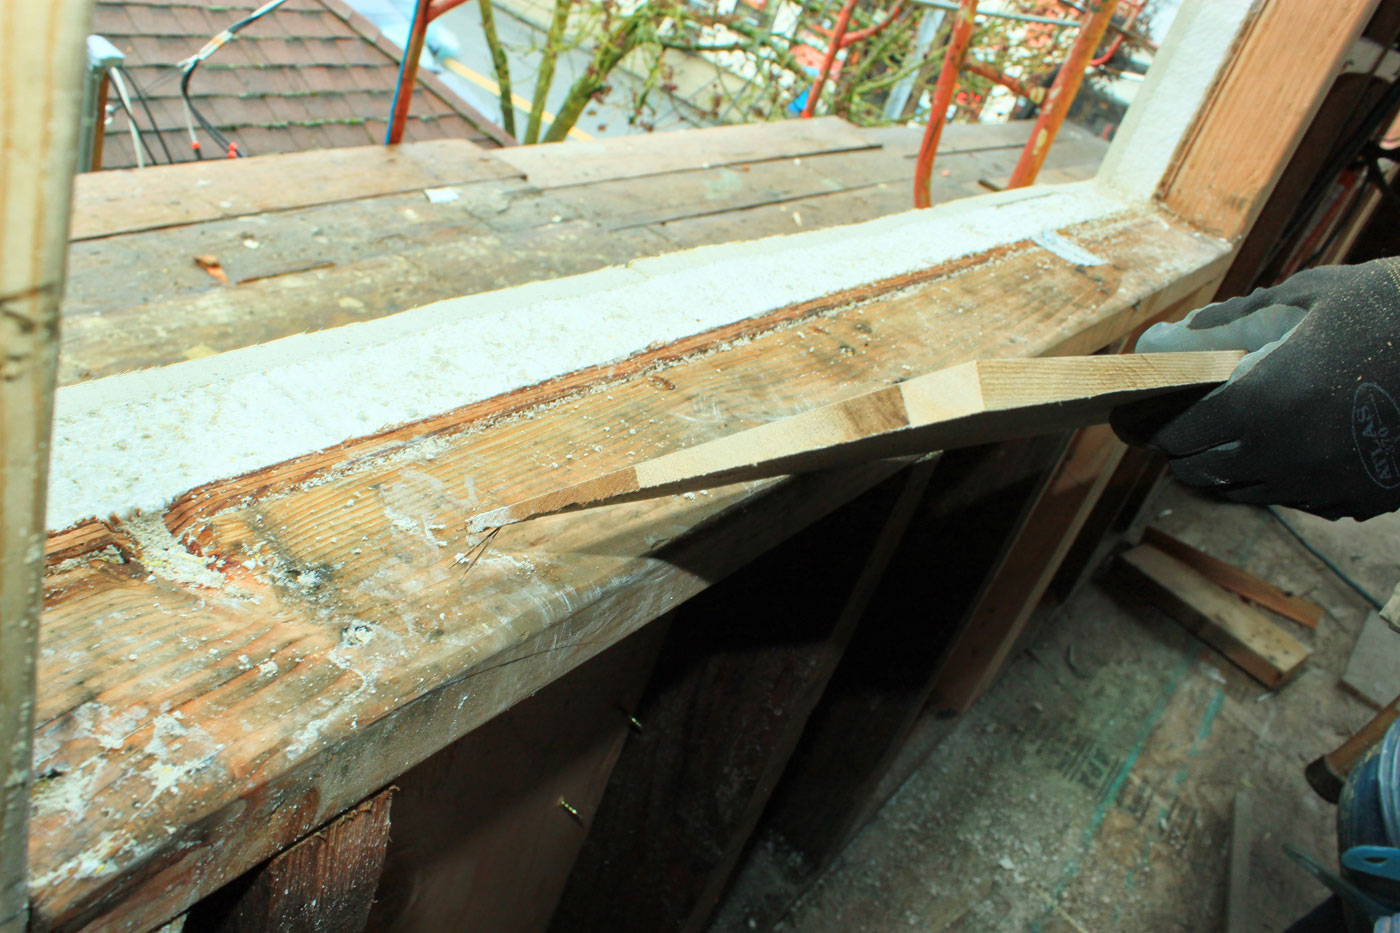
Secondary sill being placed to span the framed sill, exterior EPS, and cladding layers.
ii. Reinforce structural seams and embed transition membrane: We used a vapor-permeable fluid-applied joint and fastener treatment (Joint & Seam) to coat fastener penetrations and seams between framing, sheathing, the secondary sill, EPS, and DensGlass. To tie the rough opening to the building’s exterior moisture management system Hammer & Hand then embedded sheets of Sure-Flash into the wet Joint & Seam, creating a WRB transition flap under which the exterior sheet WRB can shingle in.
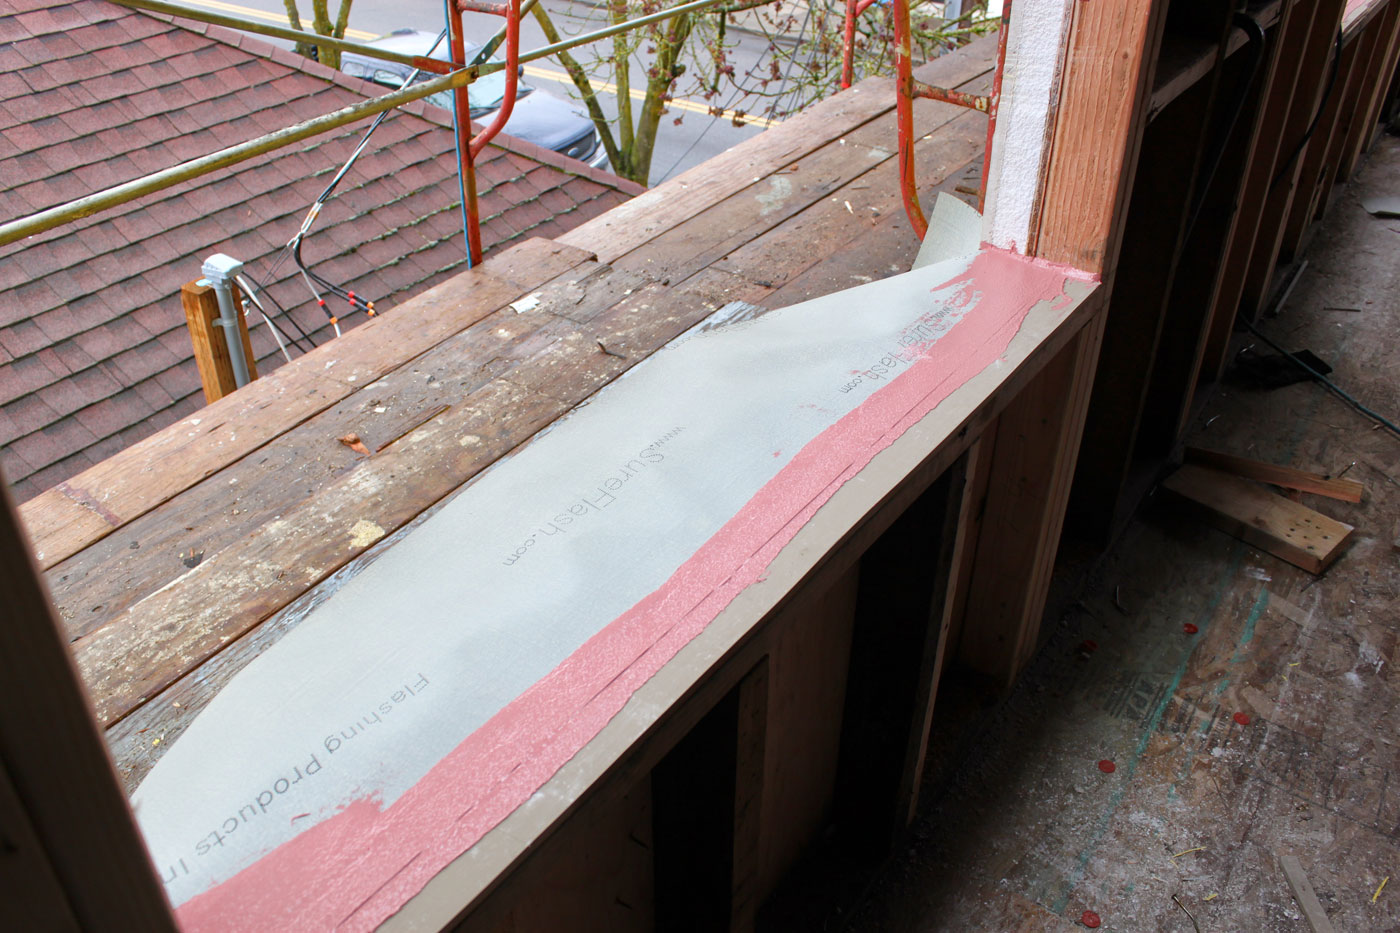
Transition membrane embedded in Joint & Seam treatment.
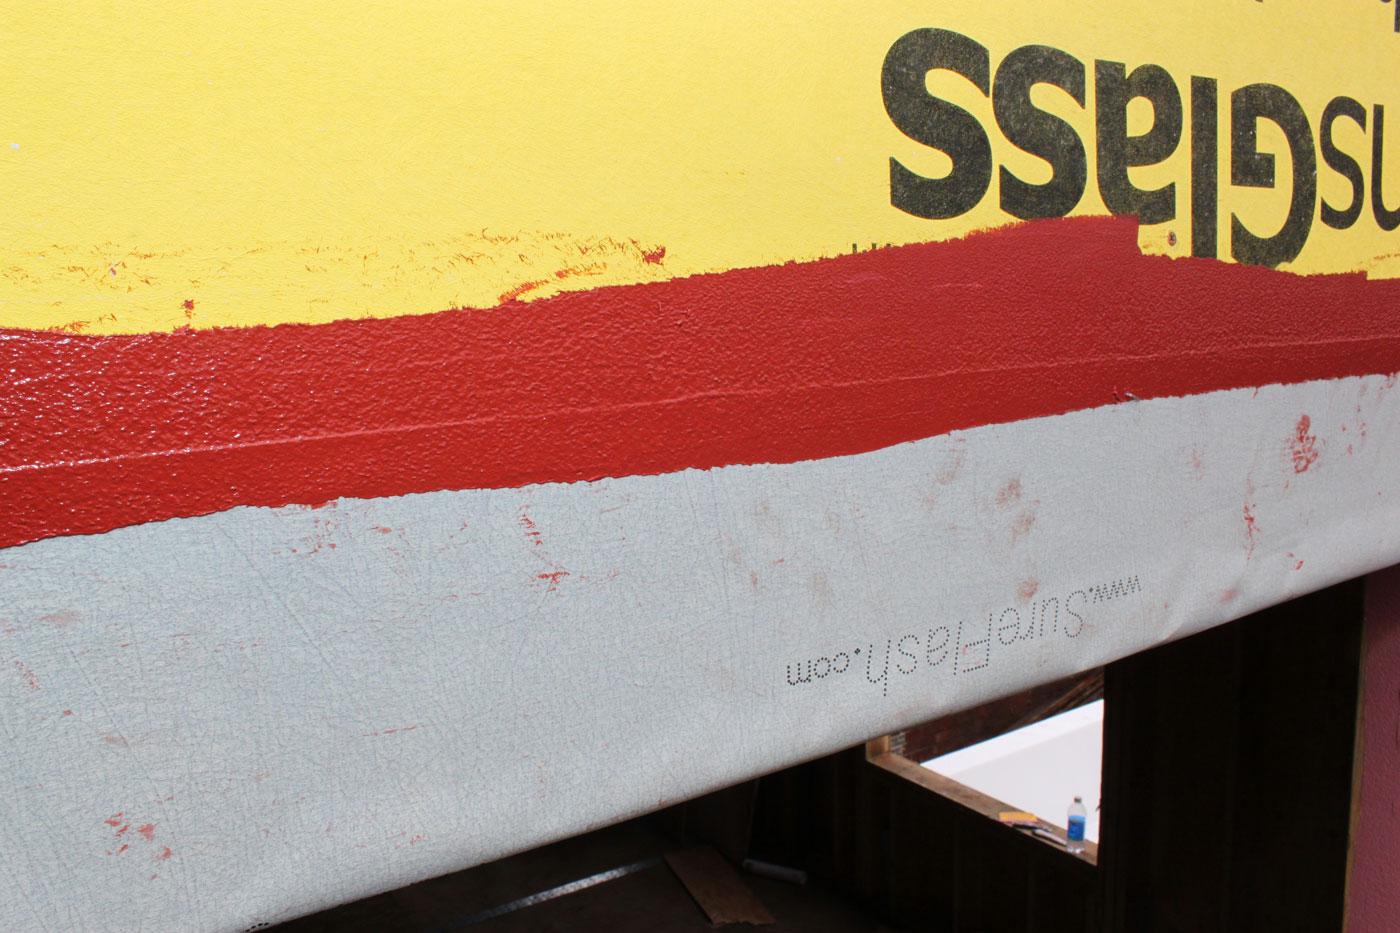
iii. Apply liquid flashing: Next Hammer & Hand applied the liquid flashing to the rough opening, careful to create a consistent layer of the product throughout the rough opening. The team extended this layer of flashing out onto the face of the building at least 9 inches in all four directions, tying into the building’s water-resistive barrier (WRB) system.
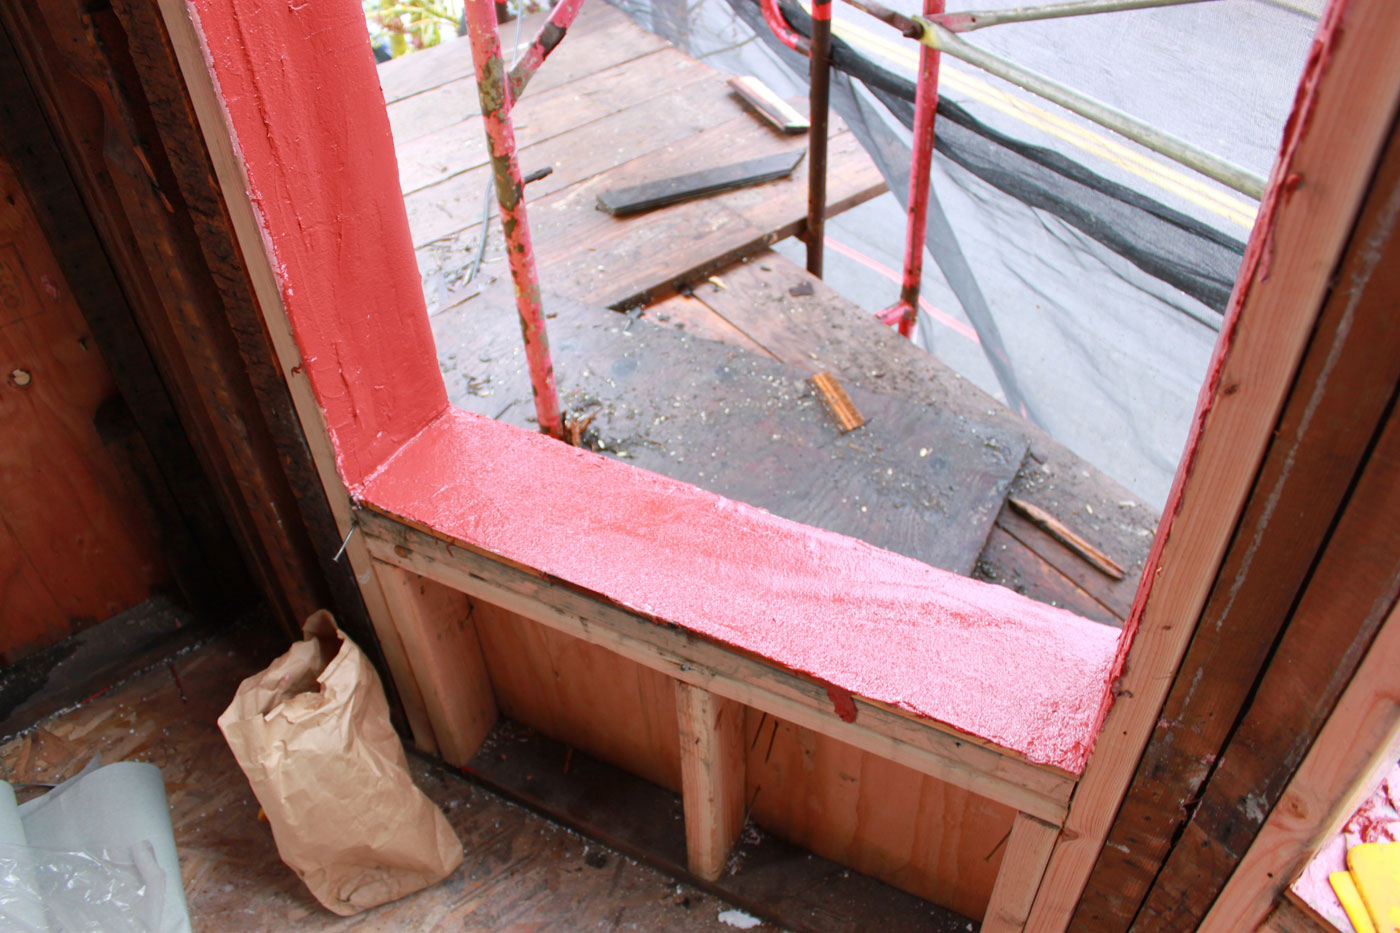
Liquid applied flashing applied to rough opening.
Liquid applied flashing extended past the SureFlash membrane at least 9 inches out from rough opening.
There are two reasons for this approach. First, liquid-applied flashing self-gaskets, protecting the integrity of the exterior sheathing immediately around the rough openings, an area that receives lots of fasteners and penetrations. Second, if water does get driven between the exterior sheet goods layer and the liquid-applied flashing, gravity can take over and pull that water down the assembly, where it can be managed by the Sure-Flash transition membrane. Nine inches, based on test chamber results, provides enough horizontal room for wind-driven moisture to be drawn down by gravity, ensuring that water laps out over the WRB system and drains off the building.
iv. Install the window: Hammer & Hand placed the windows dead level on setting blocks, with a consistent three-eighths-inch gap between window and opening. The team then installed a closed-cell foam backer rod around the perimeter of that gap and applied a high-quality sealant compatible with the flashing (Air Dam).
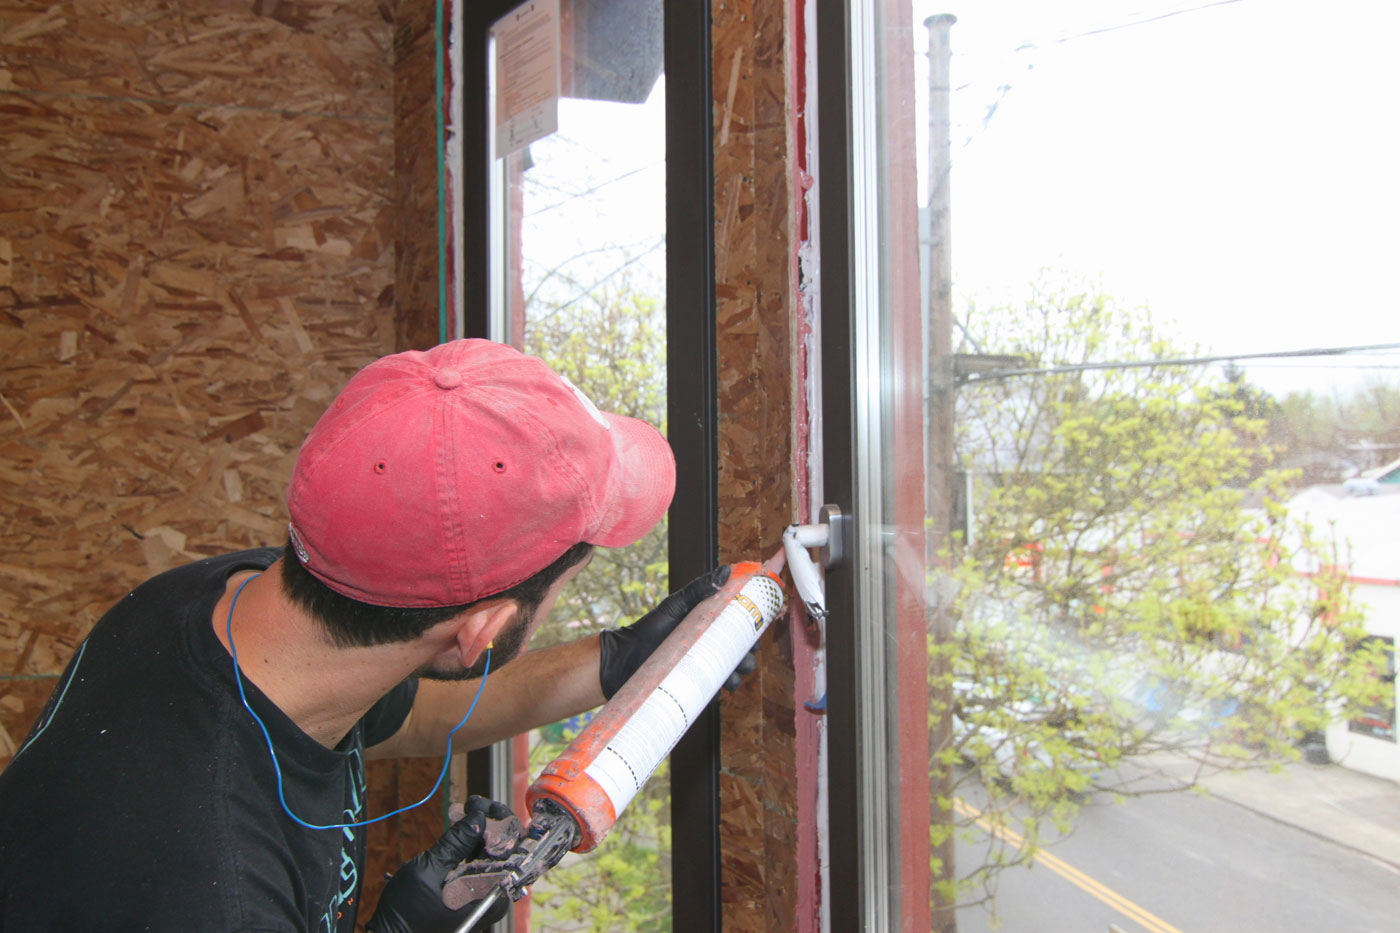
Air Dam sealant being applied.
This approach created an airtight, waterproof interior sealant joint, connecting the interior edge of the window with the liquid flashing in the rough opening. Any water that leaks through the window will hit outside that seal and drain to the exterior. Not only does bringing the seal so far to the interior create a last line of defense on the inner plane of the window, but it also is less exposed to temperature extremes and UV light. That seal will outlive the window.