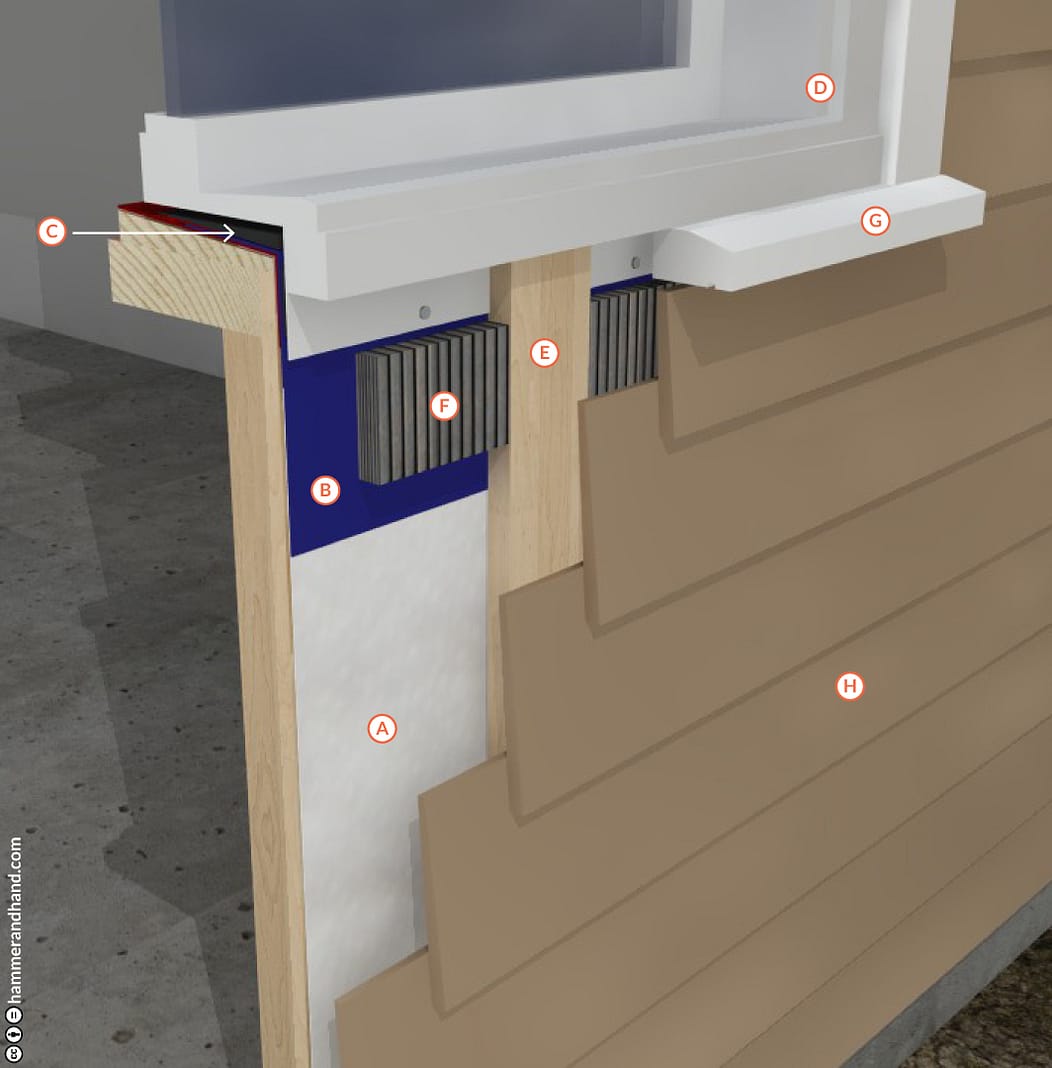
A. WRB (WATER-RESISTIVE BARRIER)
B. TRANSITION STRIP
C. SHIMS SUPPORTING WINDOW
D. INSTALLED WINDOW
B. TRANSITION STRIP
C. SHIMS SUPPORTING WINDOW
D. INSTALLED WINDOW
E. FURRING
F. COR-A-VENT SV-5
G. TRIM
H. CLADDING
F. COR-A-VENT SV-5
G. TRIM
H. CLADDING
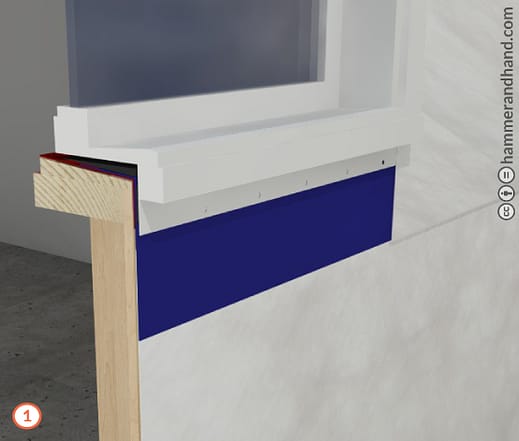
- Layer on WRB. Layer in a shingle method starting at the bottom and lapping top over bottom.

- Install vertical furring to correspond with the framing method (aligned with vertical framing members).
- Use untreated 1×4 furring.
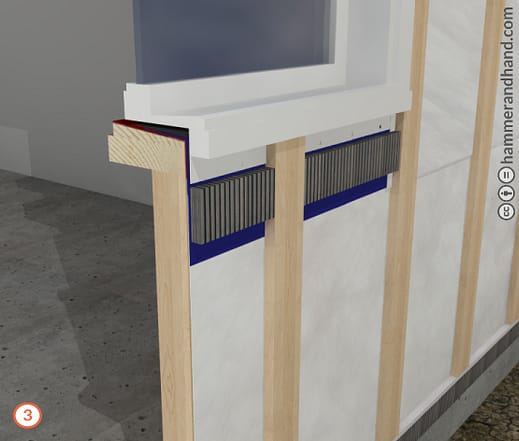
- Cut pieces of Cor-A-Vent SV-5 to fit flush in between furring below window.
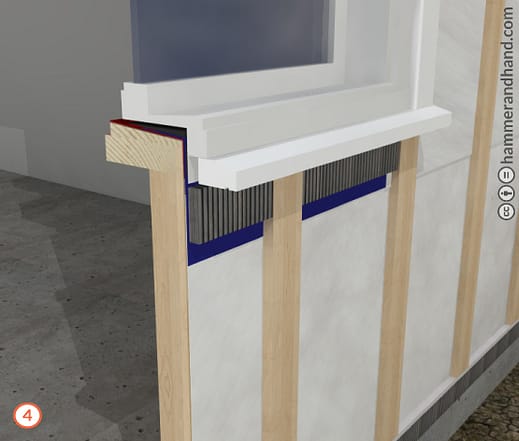
- Attach trim.
- Can be nailed to furring.
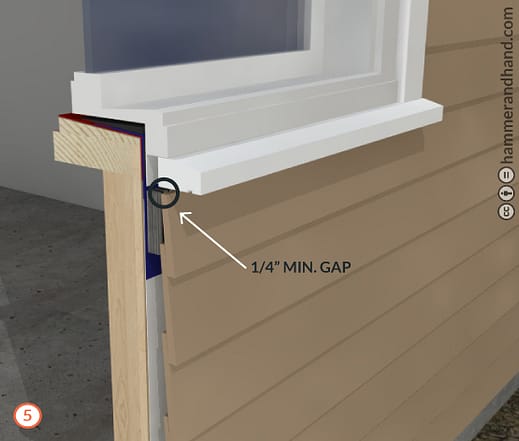
- Install siding to complete the rain screen.