6.1 Kick-Out Flashing
Whenever a roof surface abuts a vertical wall surface, moisture intrusion and rot become a risk at the connection between the two planes.
Kick-out flashing, a somewhat forgotten practice except by the best roofers, addresses this risk at the most vulnerable intersection between sloped roofs and walls: the drip edge.
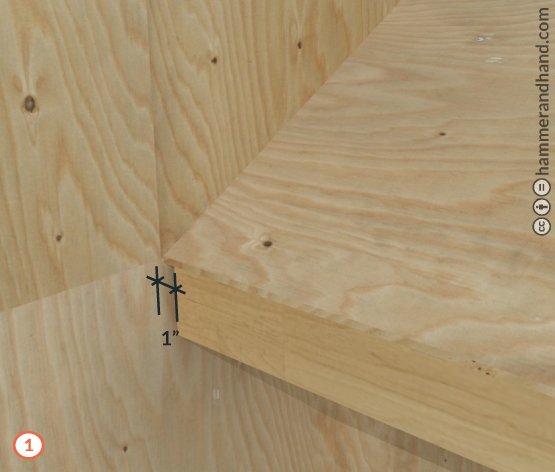
- Be sure to leave space between the end of the fascia and the wall where FastFlash, WRB, and siding can slide up.

- Install FastFlash along the wall at the roof edge.
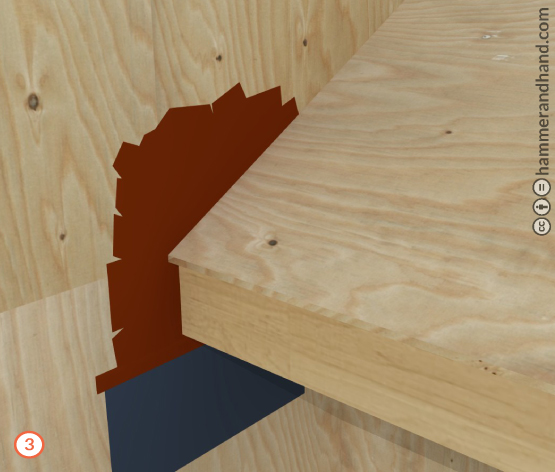
- Stick top edge of transition strip membrane to FastFlash.
- Bead and tool FastFlash to the top edge of transition strip.
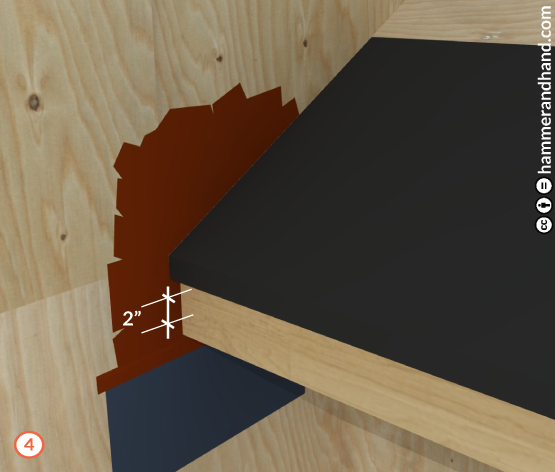
- Peel and Stick along the edge of the roof and lap over top of fascia.
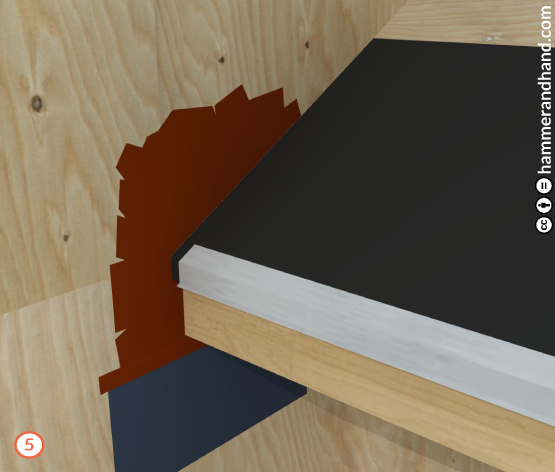
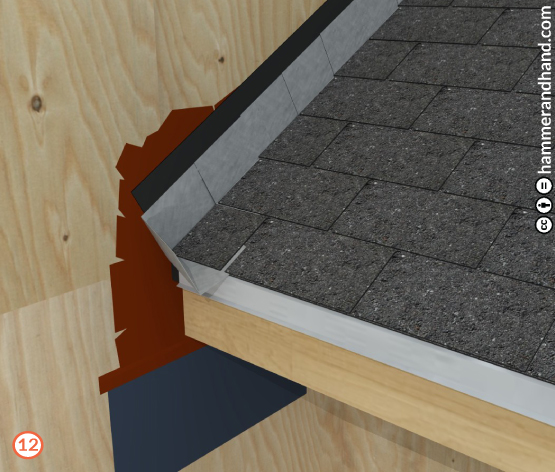
- Attach drip edge.
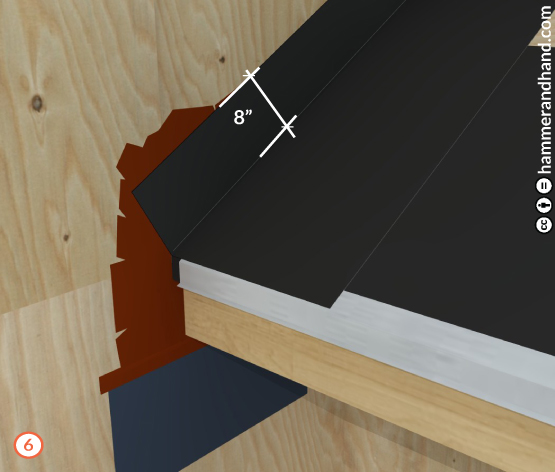
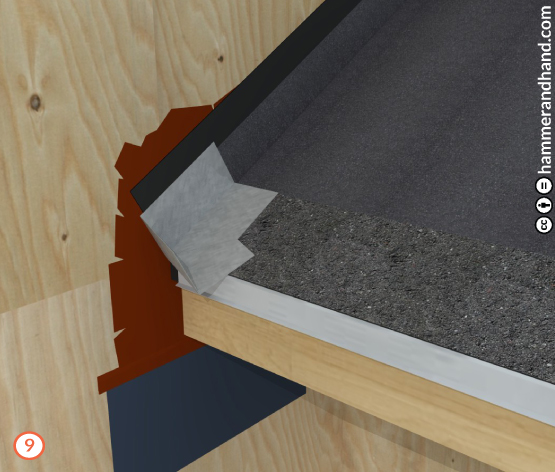
- Install Peel and Stick the entire length of the roof-to-wall intersection.
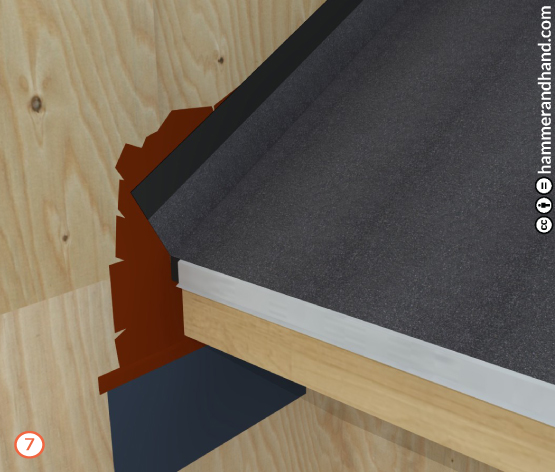
- Attach roofing felt. Extend 4” up the wall.
- Nail on starter strip of roofing material.
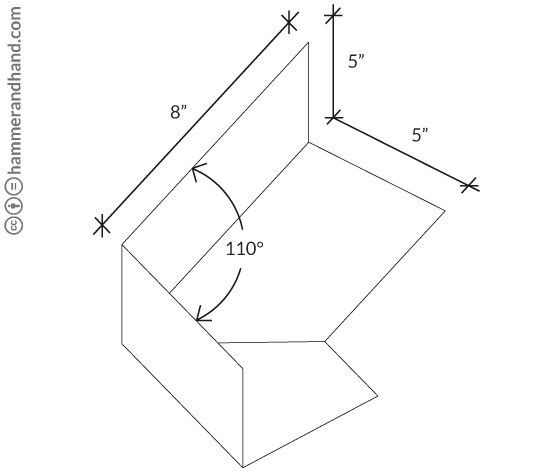
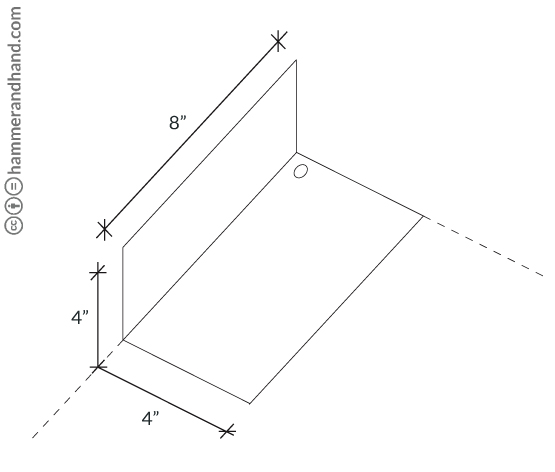
Kick Flashing Guide
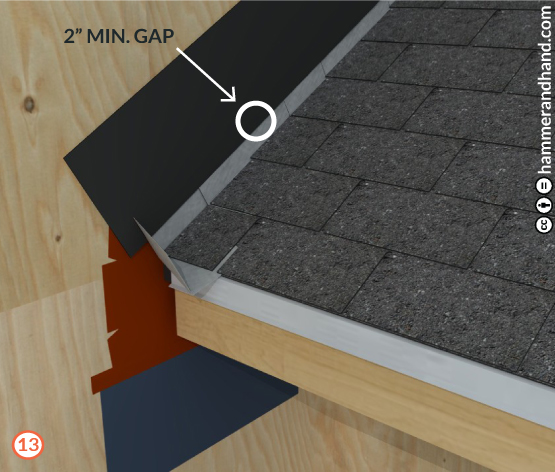
Note: All Kick-Out Flashing fabricated on site must have welded seams.
Note: All Kick-Out Flashing fabricated on site must have welded seams.
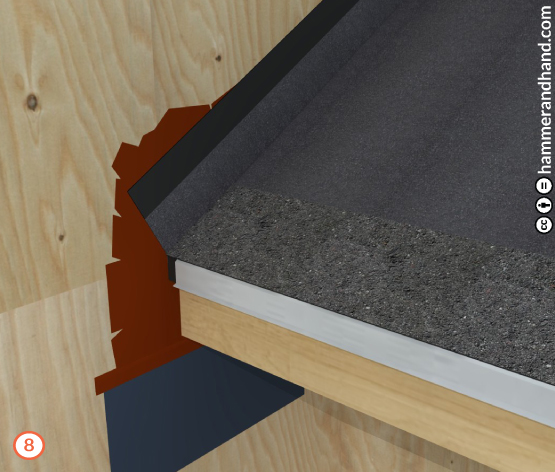
- Fasten kick flashing in upper right corner.
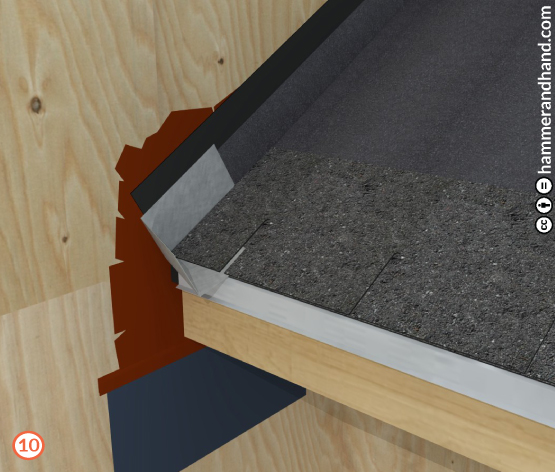
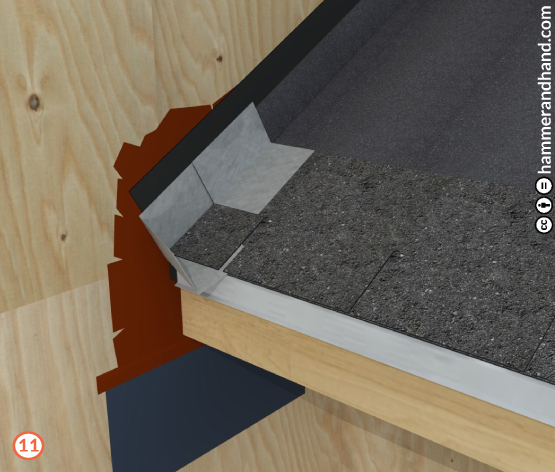
- Install first course of shingles.
Step Flashing Guide
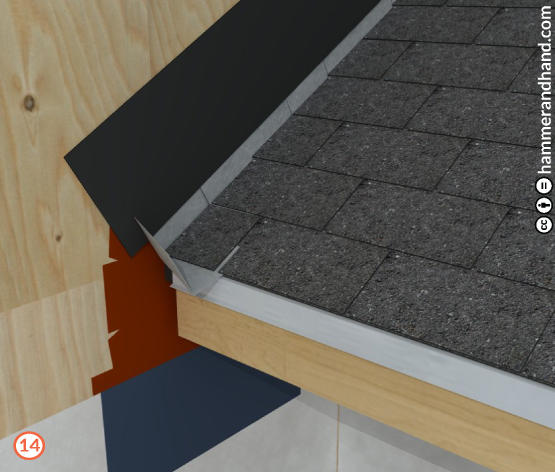
Note: Align with top edge of shingle course.
Note: Align with top edge of shingle course.
- Fasten stepped flashing.
- 2” minimum overlap with preceding piece of flashing. Top of flashing piece should align with top of shingle course.
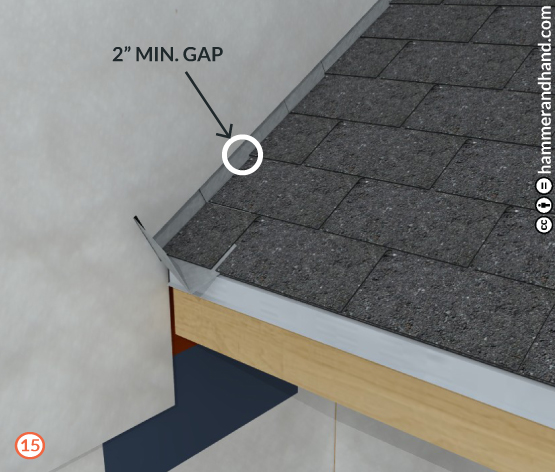
- Continue alternating shingle course and stepped flashing until the roof is complete.
- Install Peel and Stick over the stepped flashing.
- Slip WRB as high and tight as possible under the transition strip membrane.
- Continue layering WRB up to the top of the wall.
- 4” minimum overlap between sheets.
- Install siding.
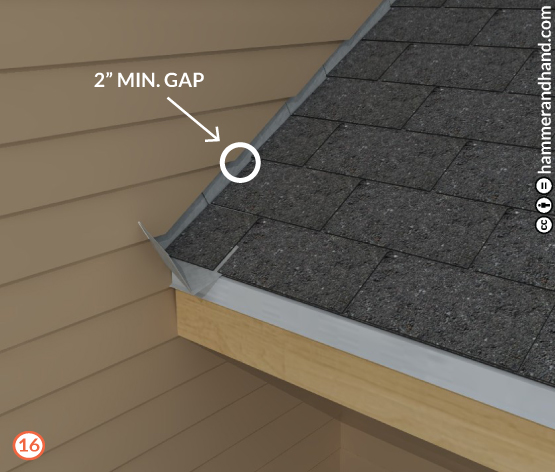
- Allow for a 2” clearance between bottom of siding and roofing material to avoid water damage.
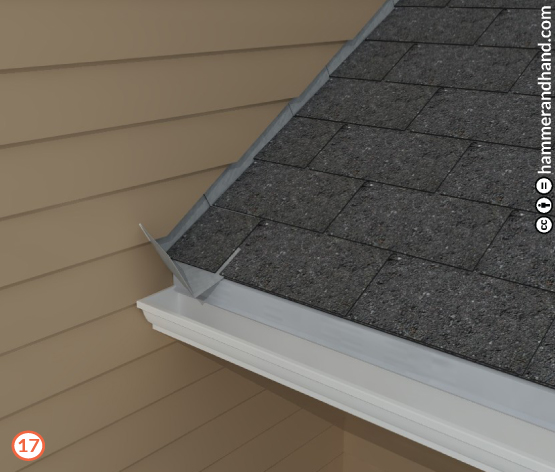
- Install gutter under drip edge.
Continue to 6.2 Vented and Unvented Roof Assemblies >>>