Photos document Hammer & Hand’s straight-forward approach to a cutting-edge aspect of Passive House construction.
One of the most compelling aspects of Passive House construction is its emphasis on simplicity. The standard itself is simple: reach the required level of energy performance and your building can be certified.
And the means employed by Passive House designers and builders are simple, too: superinsulate, build airtight, avoid thermal bridges, use excellent doors and windows, mechanically ventilate with heat recovering ventilation, and optimize solar & heat gains through smart orientation and design.
The vanguard of 21st Century building is not about complex technology.
This illustration by the Boston firm Albert, Righter and Tittman Architects makes the point nicely. We’ve moved beyond a bunch of gadgetry and expensive mechanicals:
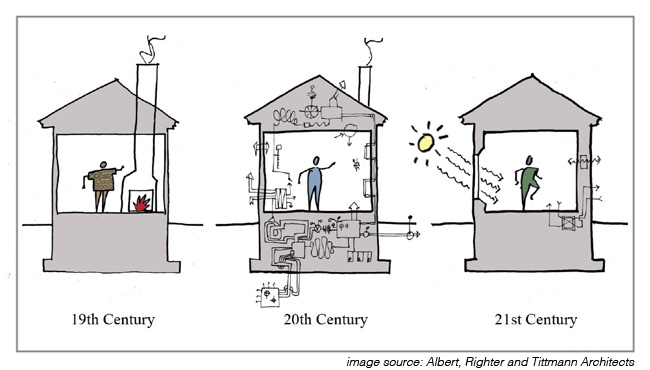
What’s sophisticated about Passive House is the advanced building science that underpins it, enabling us to take simple strategies and, with the help of powerful modeling software, combine them into designs that achieves revolutionary energy savings at optimized cost. It’s this deep understanding of buildings that allows us to move past the “20th Century” approach at the center of the illustration above.
So, there’s nothing simplistic about Passive House. But, consistent with principles of good design that date back to the Renaissance, the standard allows us to design and build elegantly simple, high performance structures.
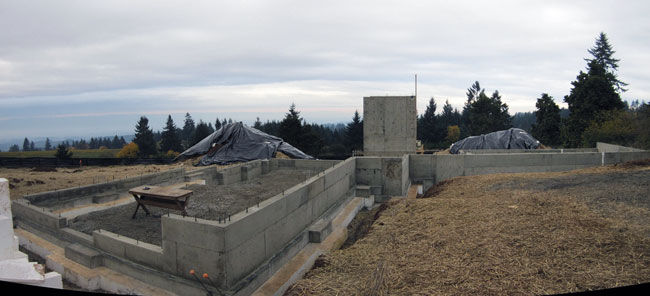
The Karuna House isn’t just pursuing Passive House certification, but also LEED for Homes Platinum and Minergie-P-ECO. (See this Field Notes post about the three certifications.) But this drive for simplicity permeates the project team’s work, both by Holst Architecture at the design table and Hammer & Hand on the construction site.
“What we’re finding as we build Karuna,” Lead Carpenter Scott Gunter told me, “is that while we’re definitely doing ‘outside the box’ stuff out there, we’re drawing on straight-forward, time-tested construction techniques to make them happen.”
A case in point: in our last video installment about Karuna, Scott demonstrated how his team installed a layer of geofoam insulation that the future house will sit on. That’s certainly “outside the box” stuff. Not a lot of buildings have their foundations poured on top of a foot-thick layer of expanded polystyrene. (Yet.) But the basic techniques employed to accomplish the job – batter boards, plumb lines, leveling, screeding, compacting – would be familiar to any field carpenter.

Hammer & Hand’s Aaron Bergeson and Scott Gunter carrying the EPS foam used to insulate Karuna’s underslab.
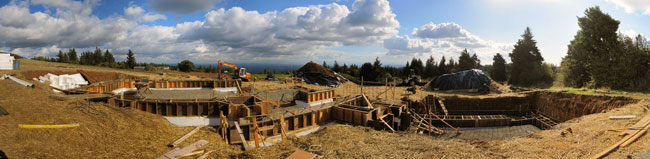
The same is also true for forming and pouring the foundation. Granted, in this case the foundation was poured on top of EPS geofoam, but Scott and his team used box form and plywood construction to do the job, standard practices taken directly from the production concrete playbook. So while we’re doing cutting-edge construction at Karuna, we hew to simple techniques whenever we can because they’re fast, cost-effective and proven.
A word about the concrete: in keeping with LEED and Minergie-ECO requirements, we’re using concrete made with a 30% fly ash mix and locally-sourced aggregate. Fly ash is a byproduct of coal combustion and can substitute for a portion of the Portland cement content of concrete. Given the high carbon emissions required to produce Portland cement, substituting with fly ash helps reduce the ecological footprint of concrete. Plus it diverts fly ash from landfills and reduces demand for the virgin materials that make up Portland cement.
Now on to the site photos. In addition to playing a key role in coordinating our team at Karuna, Hammer & Hand’s Shelley Martin is documenting construction progress on site. Scroll on for her photos and Scott’s notes…
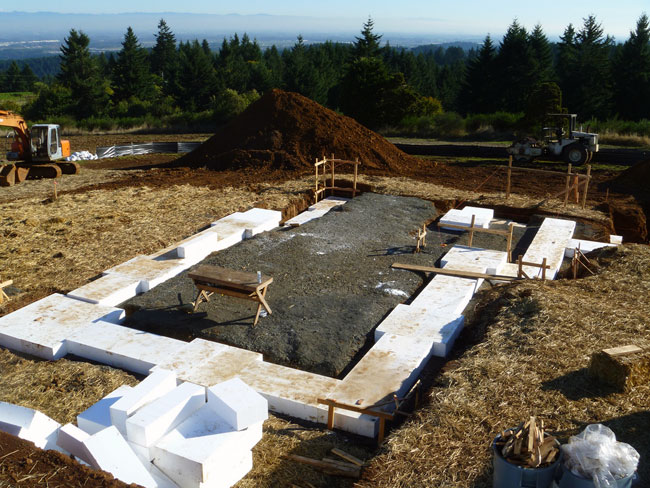
Installation of the geofoam insulation under the footings is underway.
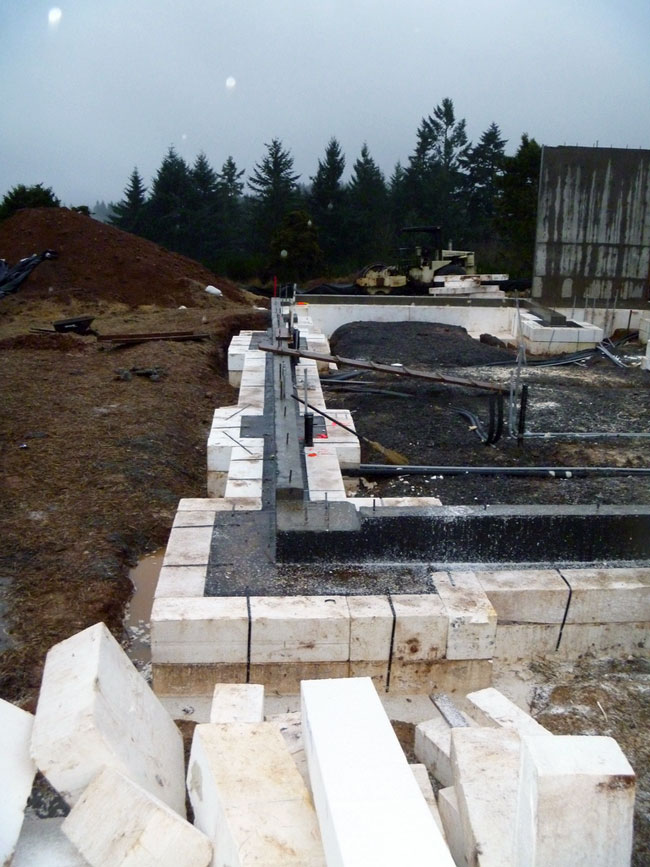
Here we see the formwork for the footings – standard box form construction.
Another view of the formwork for the footings.
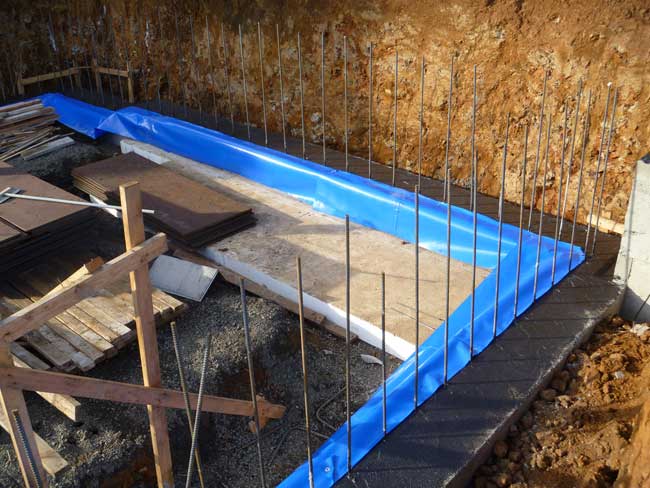
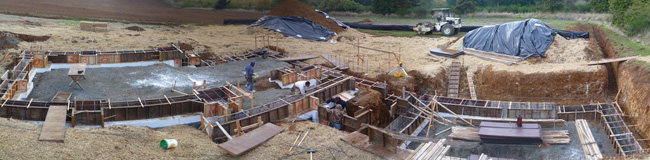
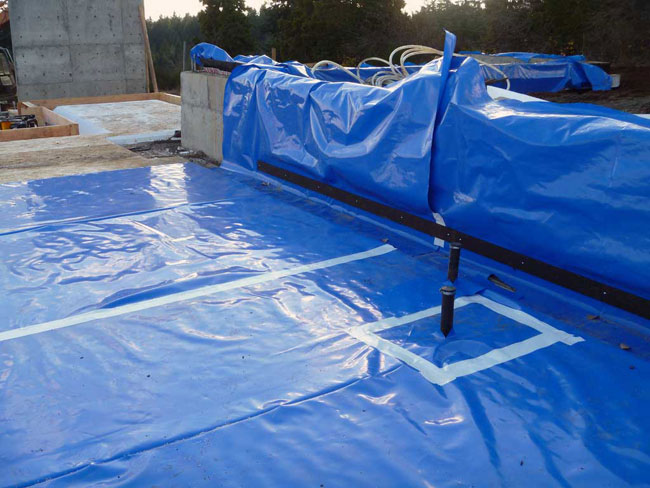
In this shot the footings have been poured and a black capillary break material has been installed. Concrete likes to wick up water, so this capillary break will keep moisture from coming up through the footing and transferring into the stem wall and up into the floor slab. The blue material is the vapor barrier tied into the underslab insulation.
This shot shows a broader view of the footings with the black capillary break installed on top.
Here we see how the footings sit on top of a thick layer of EPS geofoam. (See this video for detail about the process.)
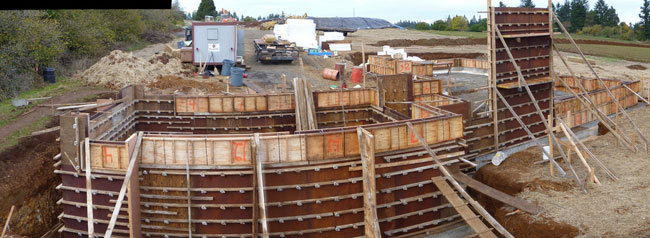
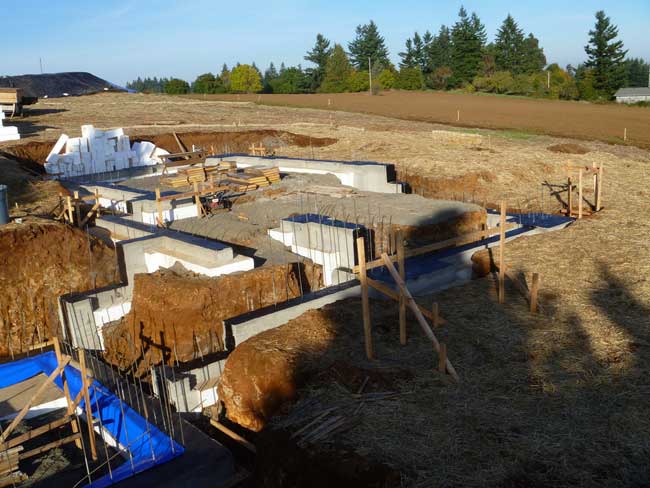
This shot shows formwork for the foundation walls using standard plywood and box form construction.
Here the footing and wall pour is complete, with concrete that has a 30% fly ash blend with local aggregate. The next step will be to roll on the waterproof air barrier, an emulsion made specifically for “green” (ie. not-yet-cured) concrete. We were able to apply the waterproof air barrier just 24 hours after stripping the forms – a nice timesaver.
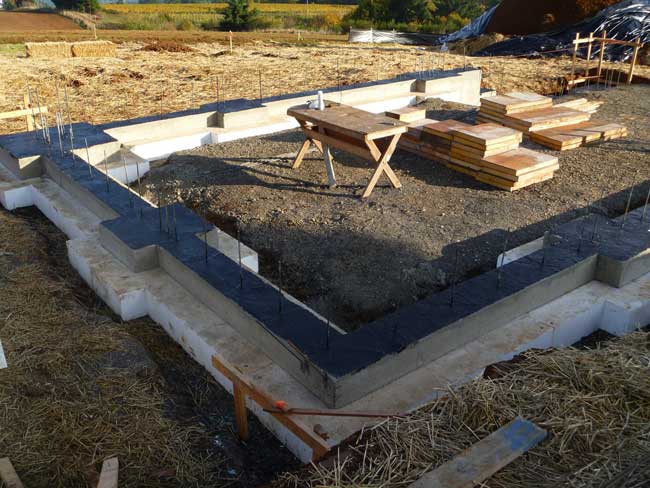
Here we see the footings and wall casts. As you can see, we’ve rolled the EPS foam up and around the footing and have applied the waterproofing to both the top of the footings and the stem wall.
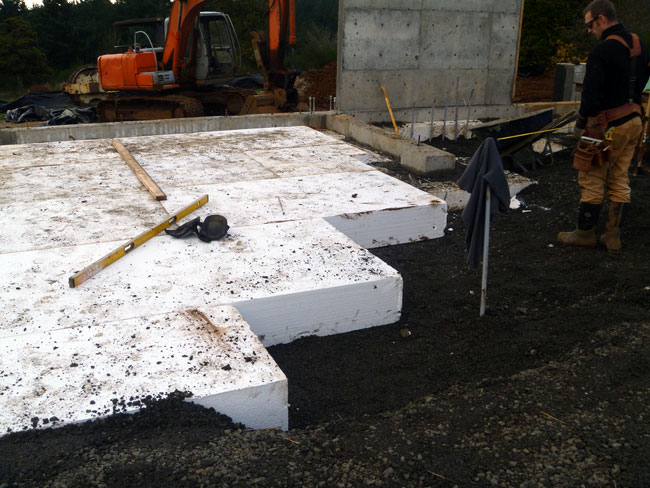
Aaron Quint examines the underslab insulation, 12” of EPS geofoam laid on a compacted gravel bed.
Another shot of the underslab insulation, closer to completion.
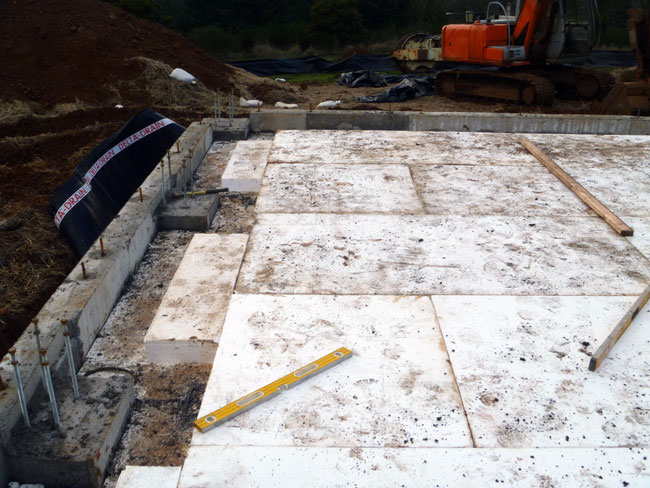
Here the seams of the 15 mm air and vapor barrier are being taped. To the right, notice the black strip across the base. That’s a ½” thick layer of compressible felt that will act as an expansion joint to allow for concrete movement.
Stay tuned for new video this week. The crew’s been busy!
– Zack
Back to Field Notes