This article was originally published in the July 2014 issue of Durability + Design Magazine.
Twenty years ago, my construction company, Hammer & Hand, built precisely according to the blueprints, signed off by professional architects and vetted by the building science experts. Yet some building enclosures failed anyway, full of moisture, rot and heartache. It was expensive and frustrating.
And it was a mystery because we built exactly as specified.
We thought we were using great technologies to seal windows and protect openings from moisture. What we didn’t see was how vapor-closed products trapped water in the walls — both construction-related moisture and moisture intruding from outside. Our industry’s technology was outpacing our understanding of how buildings function as systems. Our collective response was to over-engineer and overthink.
But trying to protect openings from moisture by adding complexity opened the door to design flaws and installation defects. Even today, most installers of high-performance windows are expected to be origami artists as they manage multiple layers of tape, peel and stick, and sheet goods.
Meanwhile, the potential consequences of design and installation flaws grow increasingly serious. As we move to buildings that are more airtight and well-insulated, the natural drying potential of building envelopes decreases. Moisture intrusions that were once a minor problem become potentially catastrophic. Hygrothermal modeling, to understand how humidity and temperature will interact in the building, is suddenly mission-critical.
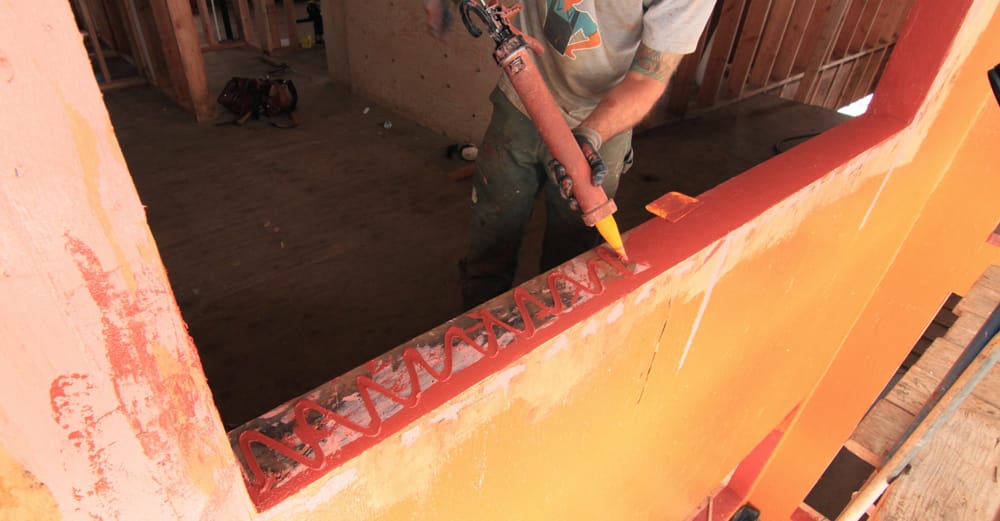
What we eventually realized is that no bulwark of tapes and sheets can beat the reliability of a properly installed liquid-applied flashing. Ironically, it was through our work constructing buildings to meet a most rigorous energy-efficiency standard that we discovered the value of this simple approach.
Rethinking How Windows Interface
Driven to overcome moisture problems in the building envelope, my firm knew we needed to be both builders and building science technicians, guided by the laws of physics. And we needed to continue pushing forward, working to transform the energy efficiency and thermal performance of our buildings.
Enter Passive House, a field-tested building approach that combines precise energy modeling with design simplicity to create durable, healthy and efficient structures. Our reasons as a builder for evangelizing about Passive House could easily fill another article, so I won’t dive into them here. Hammer & Hand has built several Passive Houses, notably the Karuna House, first in the world to achieve Passive House, LEED and Minergie certifications.
Simply put, Passive House design provides builders with a foundation in building science and high-performance building techniques necessary to construct buildings that outperform and outlast conventional structures.
It was through our Passive House experience that we encountered a new way of flashing rough openings and installing windows that prevents water intrusion into the walls through the rough opening.
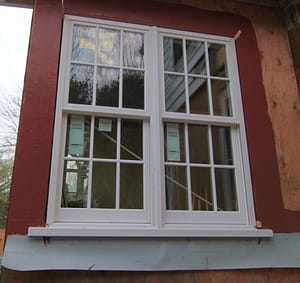
For thermal reasons, windows are usually placed at the center of the rough opening in Passive House projects, rather than at the exterior face of the building. That transforms the way the window attaches to the building and the way the window assembly manages water. You are no longer securing the window to the outside of the building with its nailing flange. Nor do you rely on the nailing flange to act as the water management layer.
Before long you realize that you are completely rethinking how the window fits into the structure. And if you are placing the window in the center of the rough opening, you’d better be sure that opening is flashed appropriately to withstand weather and moisture.
That was the first half of our “aha” revelation about window installation.
Accepting That Windows Will Leak
The second half was our dawning realization that windows are, by nature, failure-prone. It’s not a matter of if windows will leak, but when. Windows are complex, full of junctions, corners and seams — rife with opportunity to leak moisture.
Easily 20 percent of windows are already leaky when delivered to job sites, based on sill dam tests. As our colleague Tom Schneider of Building Envelope Innovations puts it, a certain percentage of windows will leak coming off the assembly line. More will leak after being packaged and shipped, yet more after unloading at the warehouse. Still more will leak once the windows arrive at the job site and are moved around, and even more after they’ve been handled and installed. Then come the forces the windows will be subjected to in situ: structural shifts as the building settles, years of wind load and weathering, aging materials and sealants.
At some point in a window’s life, it will leak. To ignore this reality is to play Russian roulette with your building envelope, yet that has been the traditional approach. When a wall rots under a window, the traditional response is “that window is defective,” not “that opening wasn’t properly flashed.”
We realized we had to detail rough openings knowing that windows will leak sooner or later. Rough openings need to be completely water-resistant to keep water from penetrating the wall assembly, but also vapor-permeable to let construction moisture, seasonal moisture fluctuation and exterior moisture evaporate from the wall. That is true for conventional installations with windows at the exterior edge of rough openings as well as high-performance installations with windows centered in the wall.
In our climate, the Pacific Northwest, the simplest way we found to achieve water-resistance was with vapor-permeable liquid-applied flashing. Any rain that hits the opening or leaks through the window drips down to the liquid-applied membrane and out to the exterior moisture-management layer.
Keeping Water Out in Four Steps
The beauty of this approach is that it is easy to install: simplicity over complexity.
Gone are the layers of sheet goods and traditional tape membranes building layer upon layer. No “tents” of tapes in the corners. No fish mouthing to funnel moisture where it shouldn’t go. No inadvertent reverse-lapping.
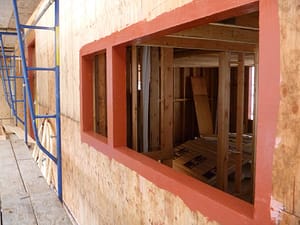
As an installation method, liquid-applied flashing is as close to foolproof as anything we know. It is much harder for a carpenter having a bad day to make mistakes with a liquid-applied membrane than with tapes, peel and stick, and papers. And errors, like inadequate coverage, are easy to identify because they aren’t hidden by layers of tapes and paper. A little spot-touching fixes the problem.
Installation involves four steps. (Note: for a detailed, illustrated description of our approach to window flashing, see the “New Window Installation” of our Best Practices Manual.)
1. Prepare the Rough Opening: Start by ensuring that the rough opening is ready for the install. It should be dead level and dimensioned precisely with a consistent installation gap — we shoot for three-eighths inch (0.95 cm) around the perimeter of the window unit. Double-check the measurements of the rough opening and modify as necessary. If the opening is too large, for example, you can add filler pieces coated with liquid-applied flashing.
We recommend budgeting time into projects for corrective action to make sure openings are ready to accept a window. The opening should be rough-sanded and dust-free. A few minutes extra prep time makes flashing application smoother.
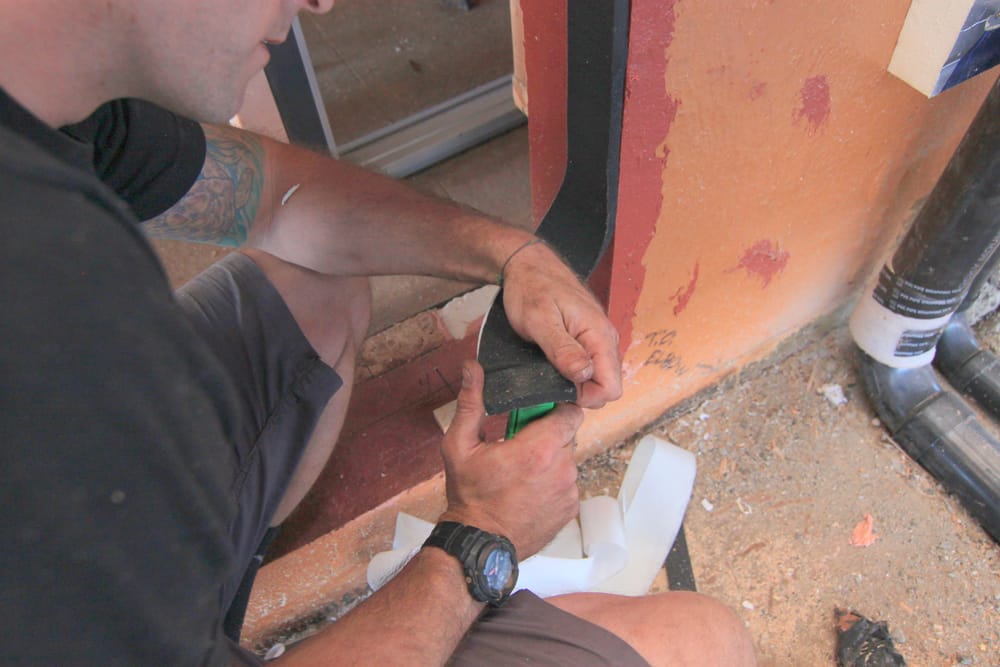
2. Reinforce Structural Seams: The traditional way to do that is with fabric mesh tapes, but they go on slowly and are prone to ripples and fish mouths. We’ve seen testing that shows that a thread poking through the flashing material can serve as a wick to bring water through the membrane.
We prefer a vapor-permeable fluid-applied joint and fastener treatment. We apply it over fastener penetrations and on all sheathing joints and seams, ends and corners in the rough opening. Make sure the treatment you use can withstand building movement, as well as filling joints and seams.
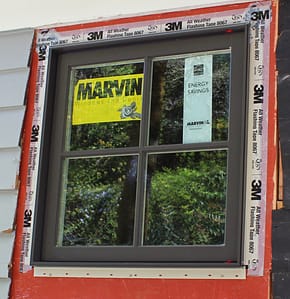
3. Apply Liquid Flashing: Now we’re ready to apply the liquid flashing to the rough opening. Create a consistent layer of the product throughout the rough opening. We recommend extending this layer of flashing out onto the face of the building at least 9 inches (23 cm) in all four directions, tying into the building’s water-resistive barrier (WRB) system.
We do this for two reasons.
First, the areas around window rough openings receive lots of fasteners and penetrations, and traditional WRB products don’t have the ability to self-gasket around those fasteners. Liquid-applied flashing, which does self-gasket, protects the integrity of the exterior sheathing immediately around the rough openings. That’s a primary line of defense from the elements.
Note that self-gasketing, or a material’s ability to close tightly around a fastener, shouldn’t be confused with self-healing. We don’t know of any products that are truly self-healing. If a nail pulls out, no membrane I’ve seen can heal itself and cover that hole.
Here’s the second reason for the 9-inch extension of flashing around the rough opening: If water does get driven between the exterior sheet goods layer and the liquid-applied flashing, gravity can take over and pull that water down the assembly, where it can be managed by a transition membrane. Nine inches is the magic number because, based on test chamber results, it gives enough horizontal room for wind-driven moisture to be drawn down by gravity. An exception to the 9-inch rule is if the flashing ties into a liquid-applied or otherwise fully structurally adhered WRB. In that case, 4 inches (10 cm) should be enough.
The transition membrane can be either a liquid-applied WRB product, or an embeddable transition sheet that shingles onto a more traditional WRB sheet good. In either case, water will lap out over the WRB system and drain off the building.
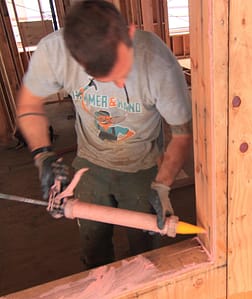
4. Install the Window: We use a level sill, no beveling, and place the window dead level on setting blocks, with a consistent three-eighths-inch gap between window and opening. We then install a closed-cell foam backer rod around the perimeter of that gap and apply a high-quality sealant compatible with the flashing.
This approach creates an airtight, waterproof interior sealant joint, connecting the interior edge of the window with the liquid flashing in the rough opening. Any water that leaks through the window will hit outside that seal and drain to the exterior. Not only does bringing the seal so far to the interior create a last line of defense on the inner plane of the window, but it also is less exposed to temperature extremes and UV light.
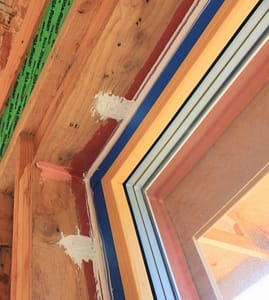
That seal will outlive the window.
On high-performance projects where thermal performance is particularly important, we take extra pains to insulate the cavity between window and rough opening. One approach is to install a one-component low-expansion foam around the exterior joint. In high-exposure applications, we seal that seam with a vapor-permeable exterior flashing tape to protect the foam from the elements. Another approach is to set the window into the rough opening using an acrylic-impregnated expanding foam tape, which, under proper compression, creates an airtight, insulated seal that sheds water.
On conventional projects, windows with nailing flanges need extra attention to integrate into the liquid-applied system. While leaving exterior nailing flanges unsealed technically won’t compromise the interior seal, we need to take care to avoid saturating wooden frames. Tying exterior flanges into the liquid-applied product therefore becomes key. For many window systems, it’s easy to embed the top and side window flanges into the liquid flashing. However, for windows with flexible nailing flanges, it’s trickier.
In those cases we use a high-performance all-weather exterior flashing tape over the flanges. The tape need not be vapor-permeable, but it must stick well in damp, cold weather and effectively bridge flange to flashing.
For an extra layer of insurance, the upper tape edge at the head of the window can get a small bead of liquid-applied flashing to prevent fish mouthing and funneling water behind the connection.
Keeping It Simple, Reliable
We’ve found these window installation methods simple in design and easy to install. They create airtight assemblies that repel liquid water but let vapor moisture escape, ensuring durability at a traditional weak spot in building envelopes. By eliminating layers of tapes, peel and stick, and papers, it’s easier for installers to do a good job, and for construction company owners like me to sleep well at night.
Our firm has used these techniques countless times, from window replacements in conventional kitchen remodels to über-high-performance window installations in demanding Passive House projects.
Simplicity triumphs over complexity, and reliability wins.
Save


