Foil-Faced Polyisocyanurate (Polyiso)
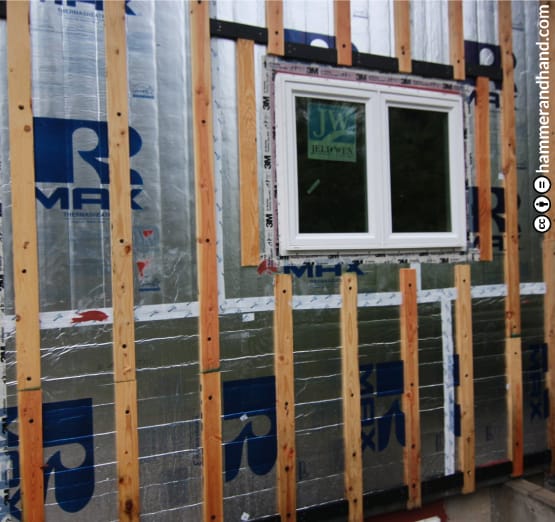
- Exterior surface may be used as a WRB, with manufacturer approval.
- Install tape at seams per manufacturer specification.
1. Must use J-Roller on tape with good detailing to eliminate ‘Fish-Mouthing.’
Expanded Polystyrene (EPS)
- Multiple layers with staggered seams recommended to accomodate product shrinkage.
- While exterior surface may be used as a WRB, we do not recommend it.
1. Install tape at seams per manufacturer specification.
2. Must use J-Roller on tape with good detailing to eliminate ‘Fish-Mouthing.’
Extruded Polystyrene (XPS)
- Limit use of this product as the material has a high Global Warming Potential.
- Exterior surface may be used as a WRB.
1. Install tape at seams per manufacturer specification.
2. Must use J-Roller on tape with good detailing to eliminate ‘Fish-Mouthing.’
Rigid Foam Insulation

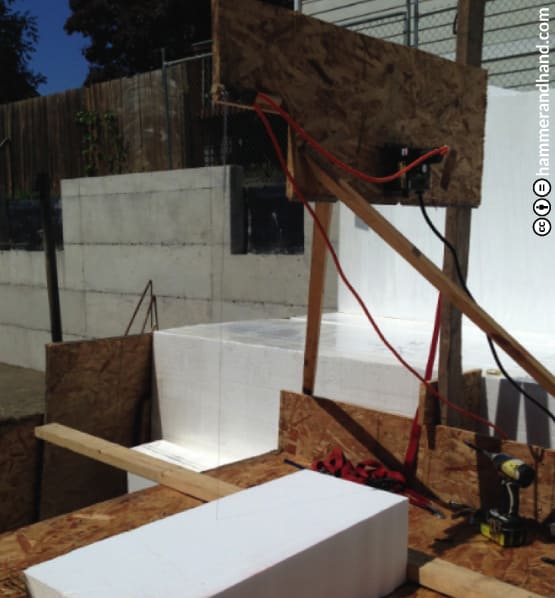
- For cutting, use knives and (for EPS and XPS) “hot wire” devices; minimize use of saws to limit dust for site cleanliness, carpenter health, and to prevent tool damage.
- If thicker than 2,” install in multiple layers with staggered seams to prevent thermal bypass.
- Fastening: consult manufacturer specifications or structural architectural drawings.
When Rain Screen Furring is to be Installed Over Rigid Insulation

2. Install second layer of rigid insulation with limited number of nails or screws with washers.
3. Fasten furring with screws; spacing and fastener size to be decided by weight of siding material and spacing of furring.
Mineral Wool AKA ‘Rockwool’ and Installation Instructions

- WRB to be placed and fully integrated at wall structure.
- Exterior flashings should be installed to minimize thermal bridging (locate back dam on outer face of first layer of insulation).
- Minimize cutting of product; when needed use specific mineral wool knives.
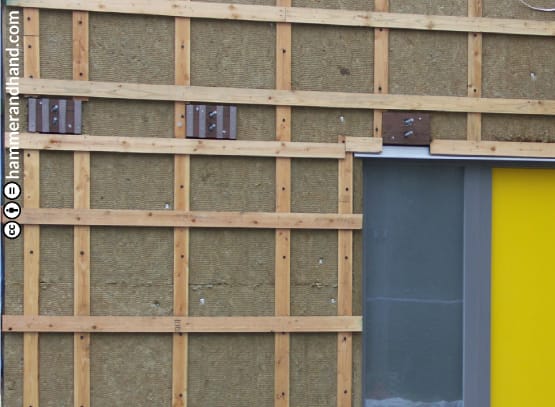
Steps for installing furring over mineral wool:
1. Install first layer of mineral wool with limited number of nails or screws with washers.
2. Install second layer of mineral wool with limited number of nails or screws with washers.
3. Align vertical edges of exterior layer to ensure coverage by furring and prevent puckering.
4. Fasten furring with screws: spacing and fastener size to be decided by weight of siding material and spacing of furring. Consult manufacturer, architectural, or structural specifications.

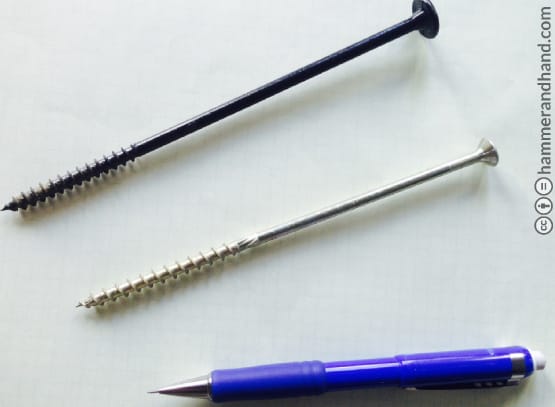
(Black) Fastenmaster Hedlock
(Silver) GRK
- Fastenmaster Technical Evaluation Report TER No. 1009-01
- Building Science Corp Report January 2014 Cladding Attachment Over Thick Exterior Insulating Sheathing

